Customers feel easy in raising support requests related to any product or query directly from the company’s website. Web to Case helps customers in doing so and in return helps the support team to respond to customers faster, hence improving the support team?s productivity.??
Web To Case is a way by which customers can post a simple, unauthenticated web page that allows customers to submit cases directly to the Salesforce.com instance. This indicates that you can use a public case submission form on your own website with your own branding and styling. Web To Case works on the basis of generating a snippet of HTML code for you and using that HTML code for form generation that can be put on any website page.
When your customer used to submit the form, the information on this form is directly posted in Salesforce org and can be assigned automatically to support teams who are taking care of the case records.?
What is it useful for?
Customers are able to automatically generate up to 5,000 new cases a day with Web-to-Case. It?allows customers to fill the details in respective fields and submit the form which directly creates a case in Salesforce CRM, and with the help of automation rules/tools ( like workflow, assignment), you can directly assign the case to the responsible team which in return saves a lot of time for support representatives.? With Web To Case, you can quickly set up a page in minutes and because it’s standard HTML, it’s easy to combine into an existing page.?
Prerequisites:
Required edition: Salesforce classic (not available in all orgs) and lightning experience
Available in: Essential, professional,Enterprise, performance, unlimited and developer Edition.
Also Check : Tips for Salesforce Einstein Bot Configuration !
Steps of Configuration
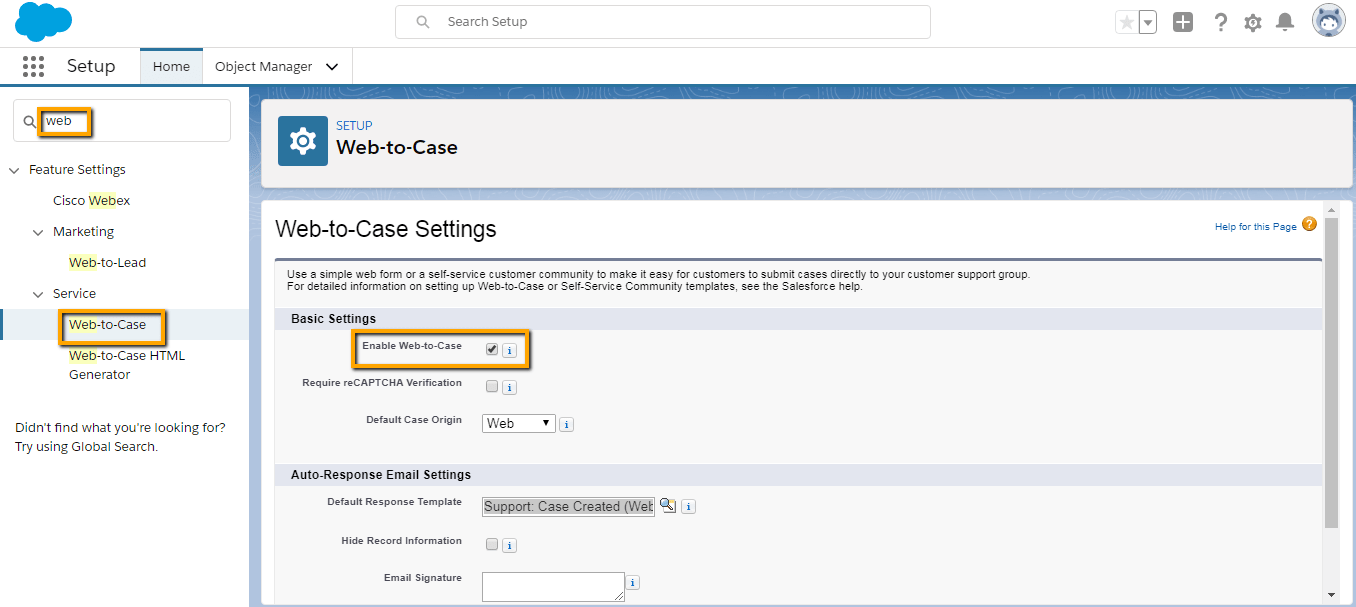
- Access Setup and type Web-to-Case in the Quick Find box, then select Web-to-Case.
- Select Enable Web-to-Case.
- You have the option to select Require reCAPTCHA Verification in order to reduce spam and require reCAPTCHA verification for customers? requests.
Once it is enabled then requests without verification don?t generate cases. Once it is enabled, do cross-check that your HTML code must include the reCAPTCHA information. - Choose a default case origin.
- Choose a default response template in order to notify customers automatically that their case was created.
You can leave this option blank if you do not wish to send emails when no response rules apply. Make sure that the template must be marked as ?Available for Use.? if you plan to send email notifications. - Select Hide Record Information for hiding the record information when the email is sent to customers in case the case creation fails.
- Enter an email signature if you want to use a different signature other than the default.
- Click Save.
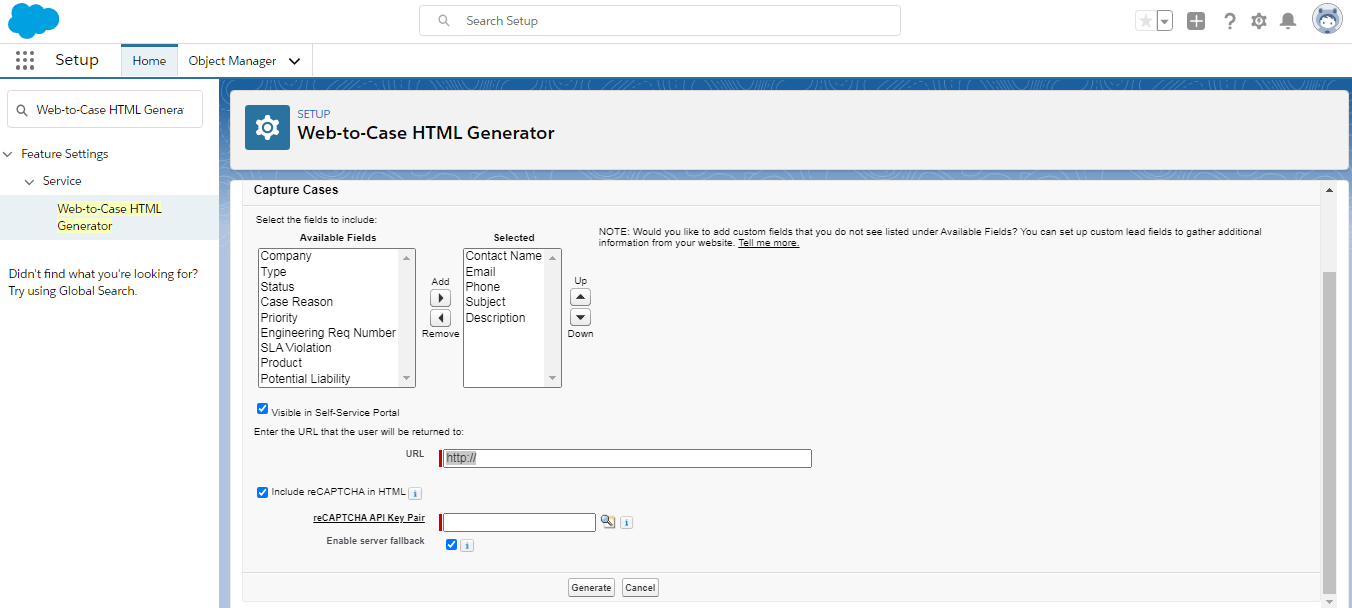
- Access Setup and type Web-to-Case HTML Generator in the Quick Find box, then select Web-to-Case HTML Generator.
- Choose the fields that you want to include into the Web-to-Case form.
You have options to use the Add and Remove arrows in order to move fields between the Available Fields and the Selected Fields lists. You can also use the Up and Down arrows in order to change the order of the fields on your form. - Provide the complete URL that will redirect customers after they submit their information.
- Click Generate.
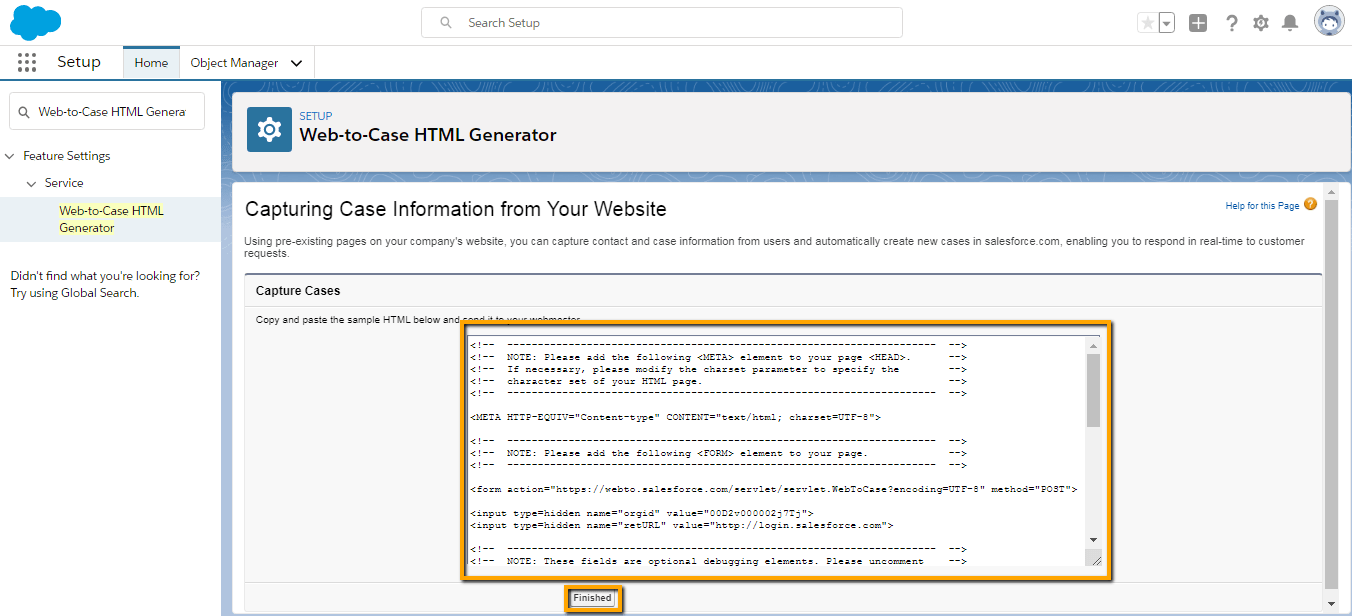
- Copy the generated HTML code and use it for the company’s website so customers can directly access it through the website.
- Click Finished.
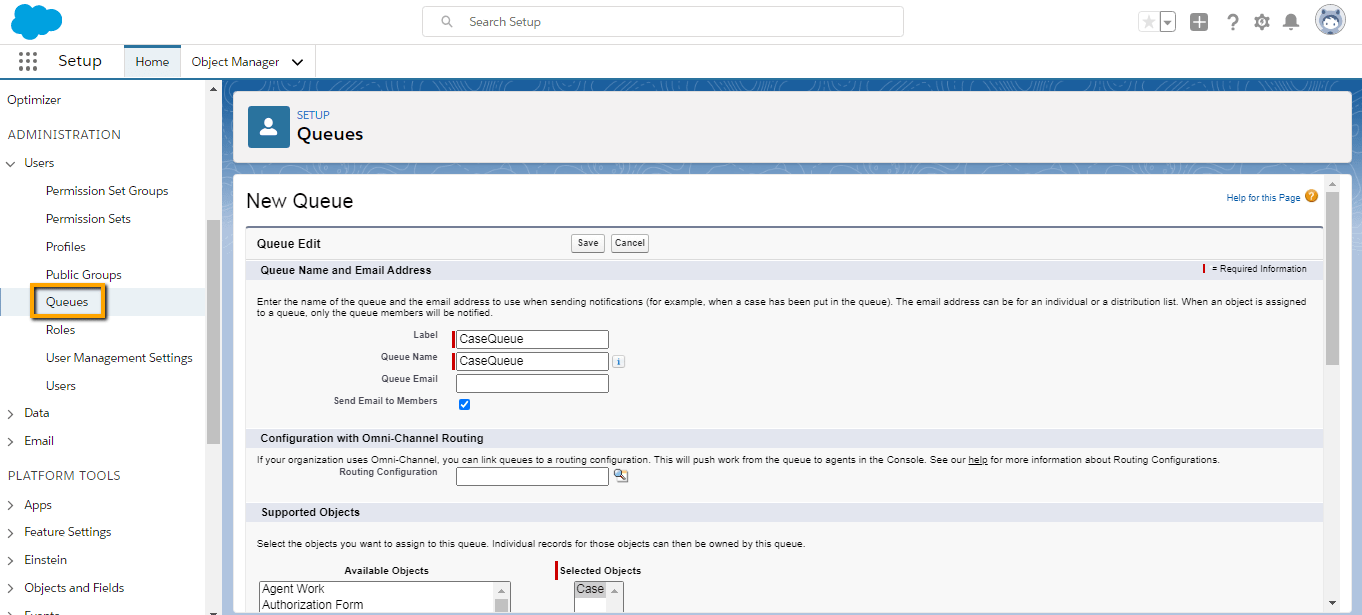
Creation of Queue
- Access Setup and type Queues in the Quick Find box, then select Queues.
- Click New.
- Enter a label and queue name.?
- Select to whom you want to notify when new records are added to the queue.
- Add which objects (here case) to include in the queue.
- Add queue members. Members can include users, roles, public groups.
Creation of Case Assignment Rule
- Access Setup and type in quick find box Case Assignment Rule.
- You will see one default active assignment rule and a new button.
- Click on the new button and give the name and make sure the active checkbox is true.
- Now click on the Rule name that you have created recently.
- Give the Rule Entries or set the criteria.
- Here I set the criteria as if case priority is high then assign it to the recently created queue named as CaseQueue.

Now whenever a case is created from a website/web form or any other means and if the priority is high then it will be assigned to the queue.

Now you can log in as a user as a part of the queue and accept the record (Case) that was created recently.
Why use Web to Case instead of Zendesk ticket Management tool
Zendesk have gone through some of the difficulty with getting historical context or details related to the tickets that are submitted, and the lack of a customer profile to really provide real-time observation into how customers feel about their support experience received or just overall sentiment related to the organization, hence must go for a more robust solution or tool i.e Salesforce Web to Case.
Conclusion
It allows organizations to capture customer support issues related to products/services directly straight into the CRM software. These features help organizations and its team in saving a lot of time that you would ordinarily use in manually logging these cases. Additionally, the information that is created on the web-to-case is structured, making it very easy to comprehend the issues at just a glance. Since it is a Salesforce built-in feature, therefore, organizations are more inclined to use it in order to optimize its support business process.
 Bio
Bio