In today?s scenario, each and every service representative (reps) and manager want to see the things like Accounts, Contacts, associated Cases with Accounts and Contacts, activities of reps on a single tab instead of switching to multiple tabs in order to see different cases with different associated Accounts and Contacts. All this can be achieved with the help of Salesforce Lightning Service Console.
The Service Console is a standard Salesforce Lightning console app that streamline the processes of service agents in order to meet all service needs. With the help of this, agents can speed up the activities like creating new contacts, cases, registering products and processing returns, all without losing the context of the interaction or needing to switch screens.?
Why Salesforce Lightning Service Console?
It is the World?s best customer service and support platform, hence companies with different domains across the globe can empower agents to be more productive by giving them new ways to deliver one-to-one support, smarter service and embedded service everywhere.
Also check: Step by Step guidance of Salesforce Youtube Integration
Advantages of adopting it
- Optimize the agent experience and put all of the information agents need right at their fingertips. It makes it possible to find everything like customer profiles, case histories and many more all in one place.
- The new Lightning Console empowers agents to apply more intelligence to every case to resolve them quickly. Hence make them more productive.?
- Includes omni-channel routing and presence so the right work is dynamically routed to the right agent at the right time, and resolving customer issues faster.?
- Managers have transparency into what work has been assigned to which agents, each agent?s capacity and can push specific work to the most appropriate agents.
- Put all of the information that needs to be delivered by your agents to customers all in one place.
- Empowers the customer service team to answer customer questions correctly at the first time, and anticipate customer needs, and deliver world-class customer service solutions every time.
- Customers also expect the quick reply related to issues from service agents. Since agents have a detailed view of a customer?s profile, purchasing history, and account information all in one place, therefore customers don?t have to repeat the whole scenario to agents.
- The dynamic adjustment of components in the console makes it easy for agents to access the information from where they need to either from front or center.
- Helps to put all of the most frequently used actions right where your agents need them the most.
Here we will discuss the steps below for setting up the Salesforce Lightning Service Console?
Create a User and Enable Knowledge
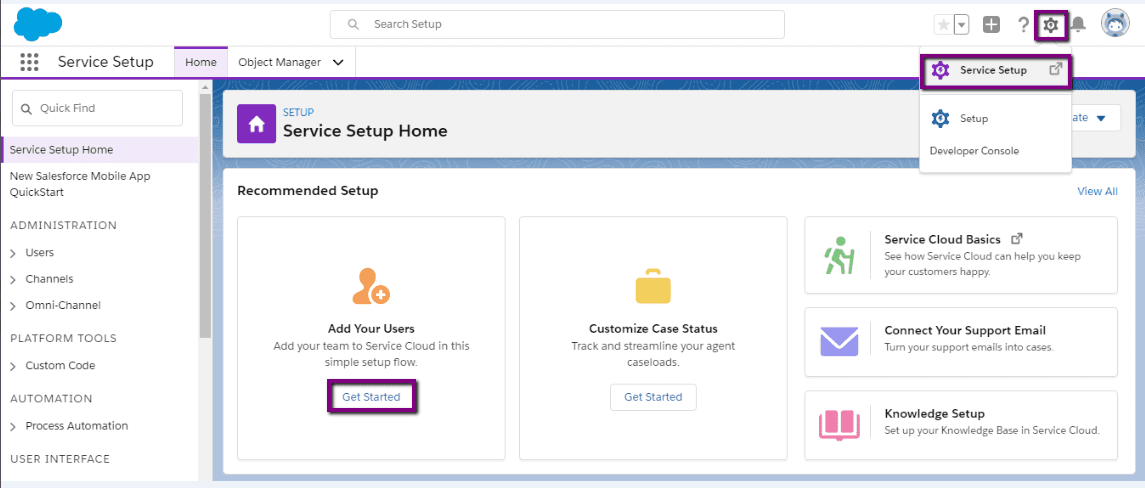
- Click on Gear icon (present on top right corner) and select Service Setup.
- Click the Get Started button present on the Add Your Users tile from the Recommended Setup flows.?
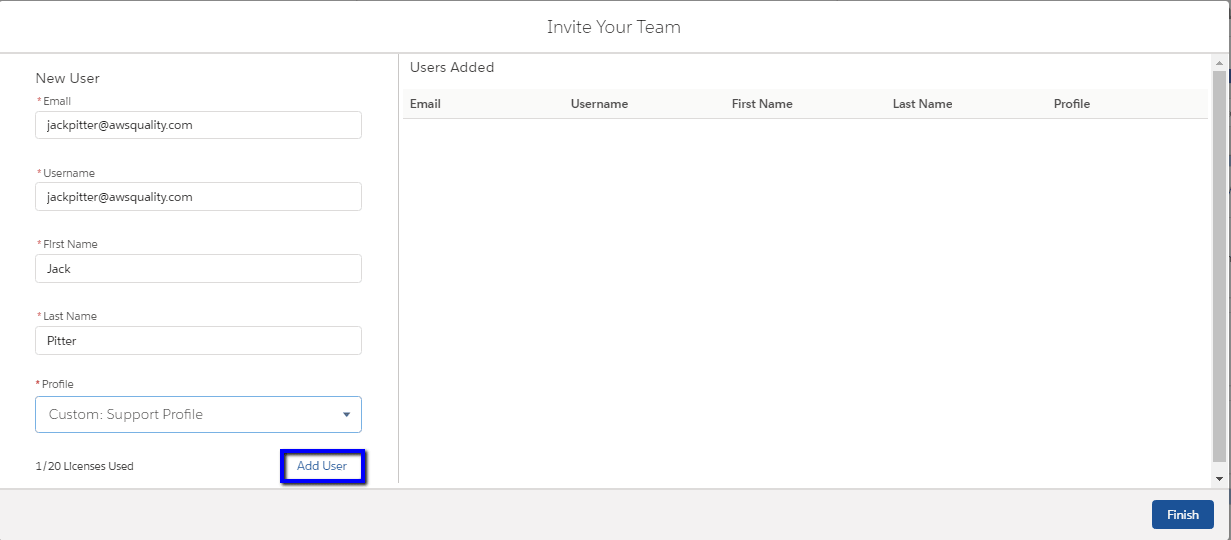
- Fill in the information like email (username),first name, and last name.
- Select Profile as Custom: Support Profile.
- Click Add User, then Finish.
- Click View All under the Recommended Setup section.
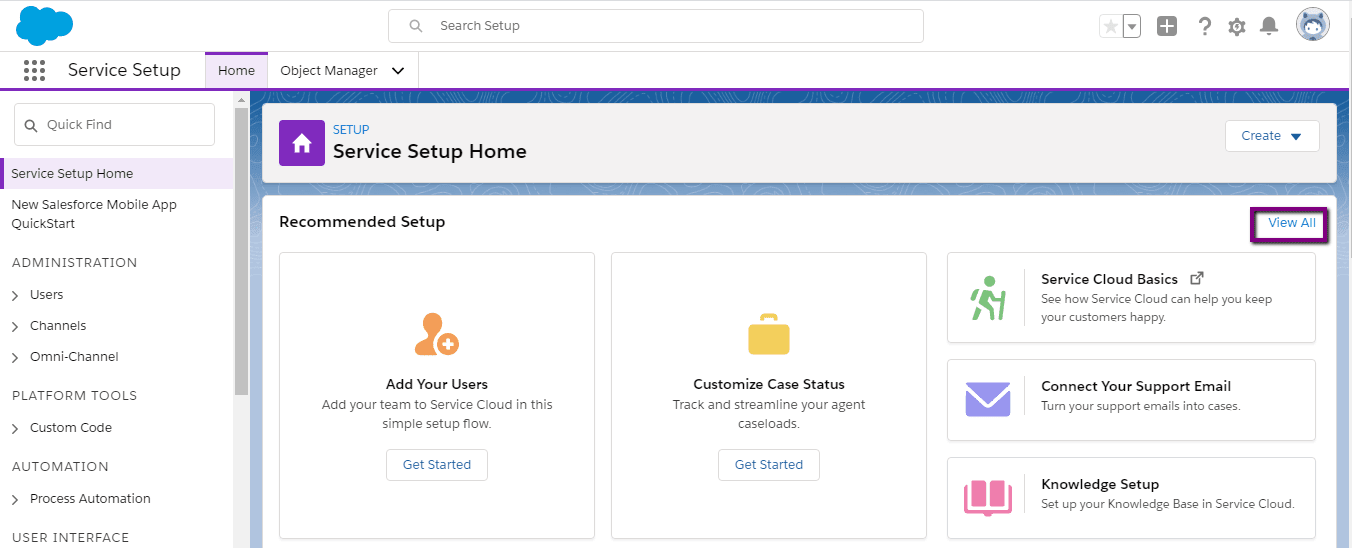
- Click the Knowledge Setup tile.
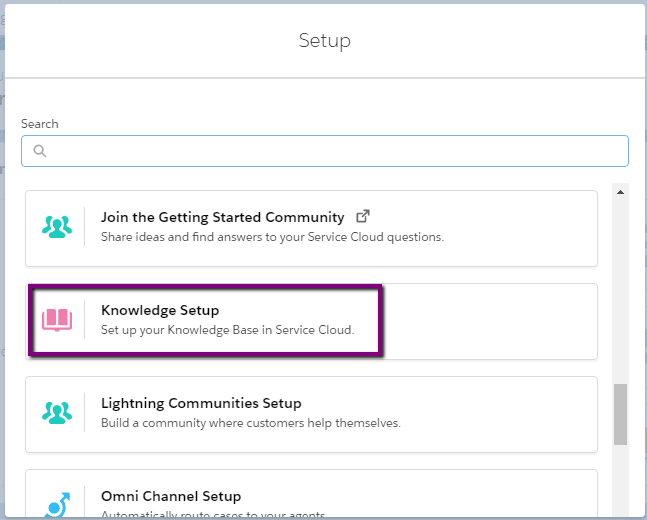
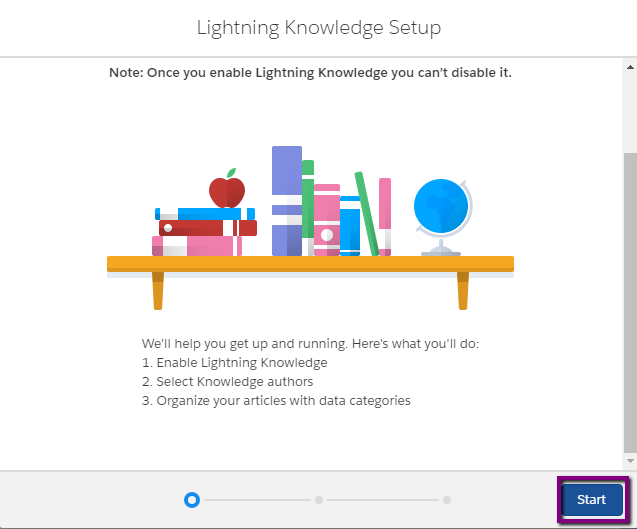
- Click Start.
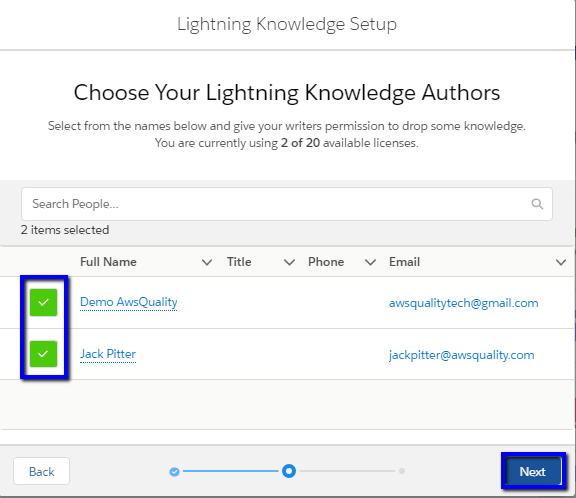
- From the Choose Your Lightning Knowledge Authors page, select the user that you have created and yourself, and click Next.
- Click Next, then click on? Finish.
Set Up the Salesforce Service Console in Lightning
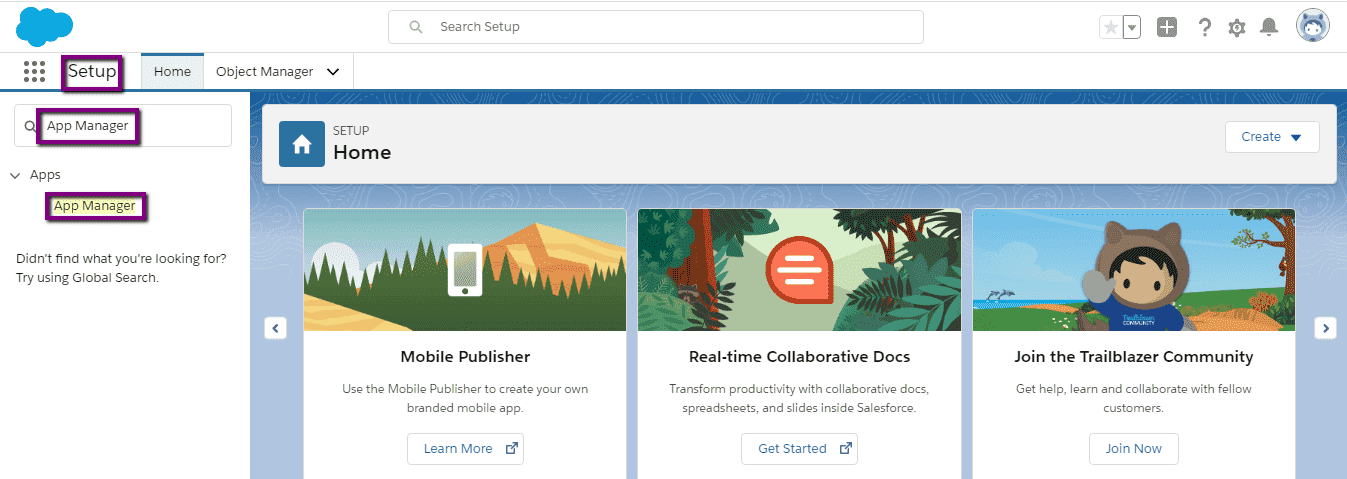
- Click on Gear icon (present on top right corner) and select Setup.
- Enter App Manager in the Quick Find box.
- Select App Manager.
- Click the New Lightning App button.
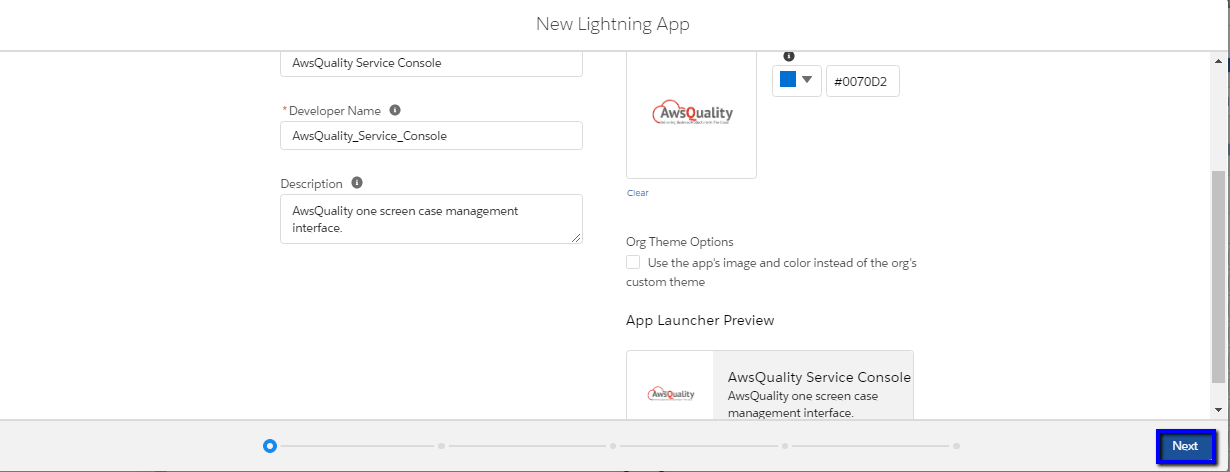
- Fill in the App Details & Branding information like app name, developer name, and description.
- Click Next.
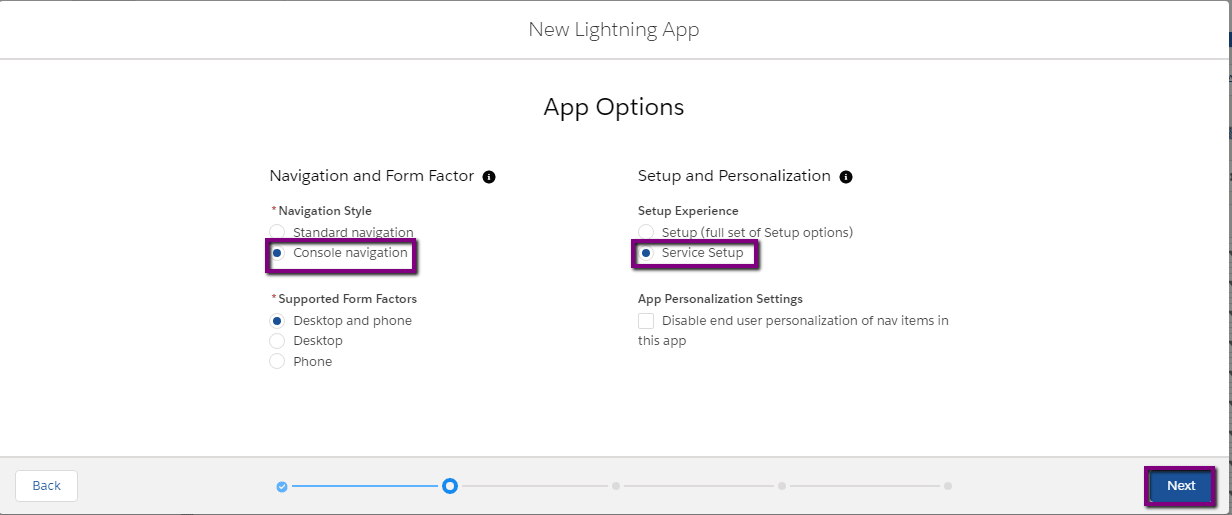
- Select Console Navigation and Service Setup? present on the App Options page.
- Click Next.
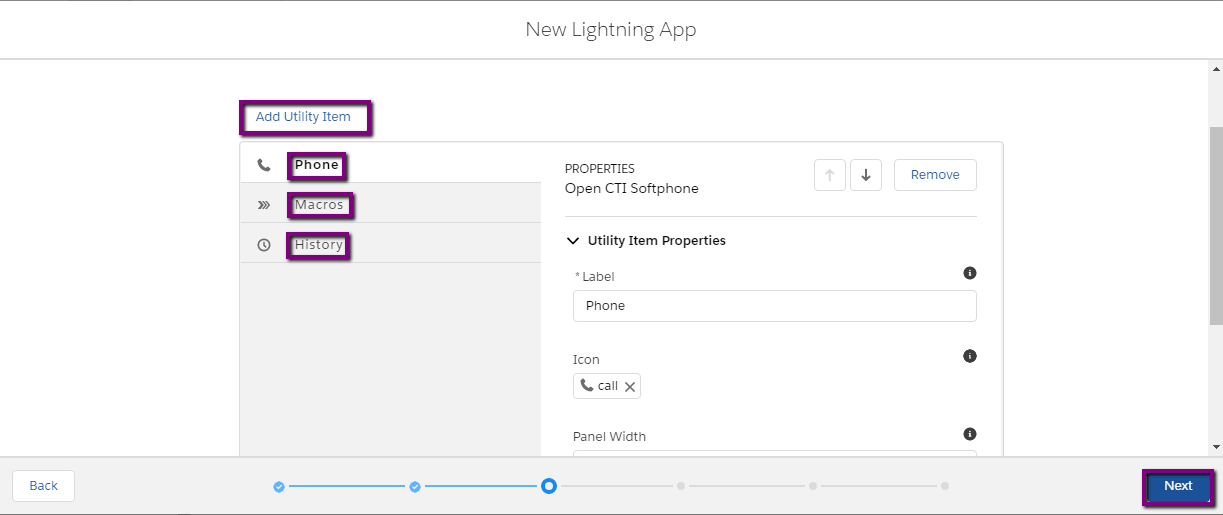
- Click on Add Utility Item present on the Utility Items page.
- Click History.
- You can also add Macros and Open CTI Softphones.
- Click Next.
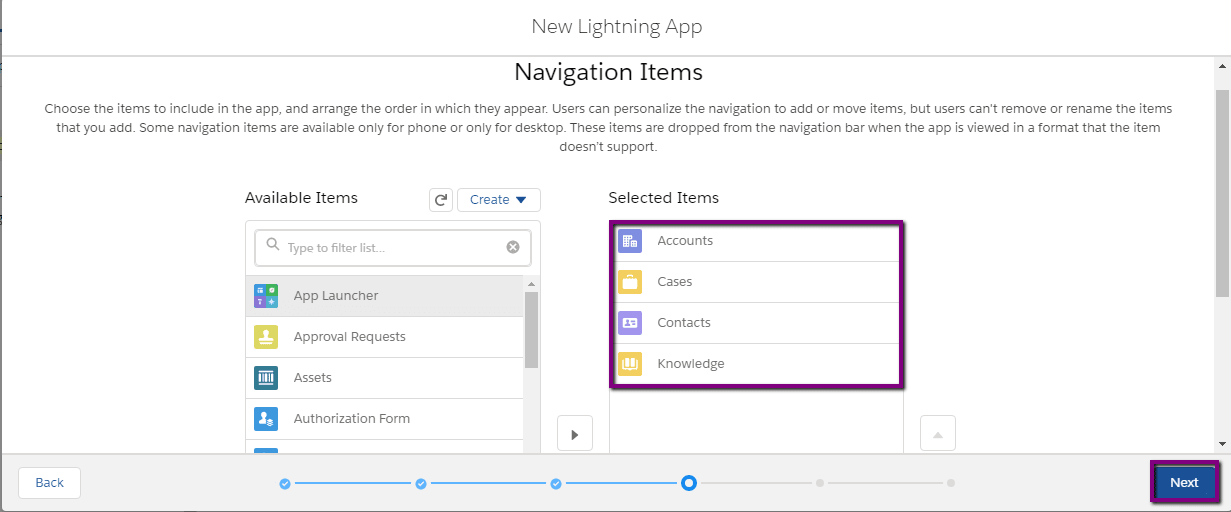
- On the Navigation Items page, select Accounts, Cases, Contacts, and Knowledge from the Available Items list, and click to add them to the Selected Items list.
- Click Next.
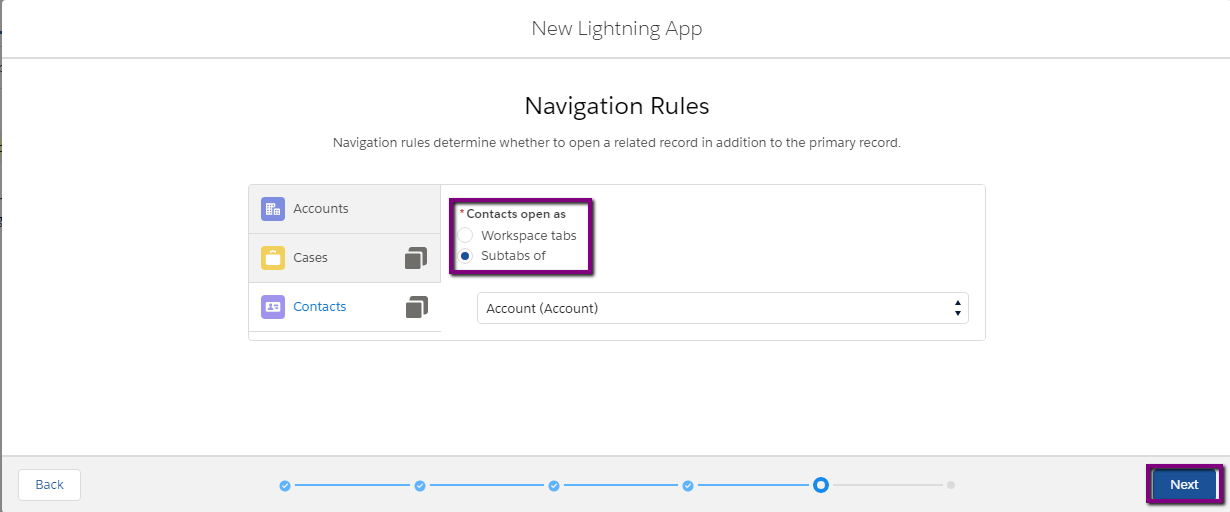
- Choose how the following will open that are present on the Navigation Rules page.
- Accounts: Select the Workspace tabs radio button.
- Cases: Select the Sub Tabs of radio button and choose Account (Account) from the picklist.
- Contacts: Select the Sub Tabs of radio button and choose Account (Account) from the picklist
- Click Next.
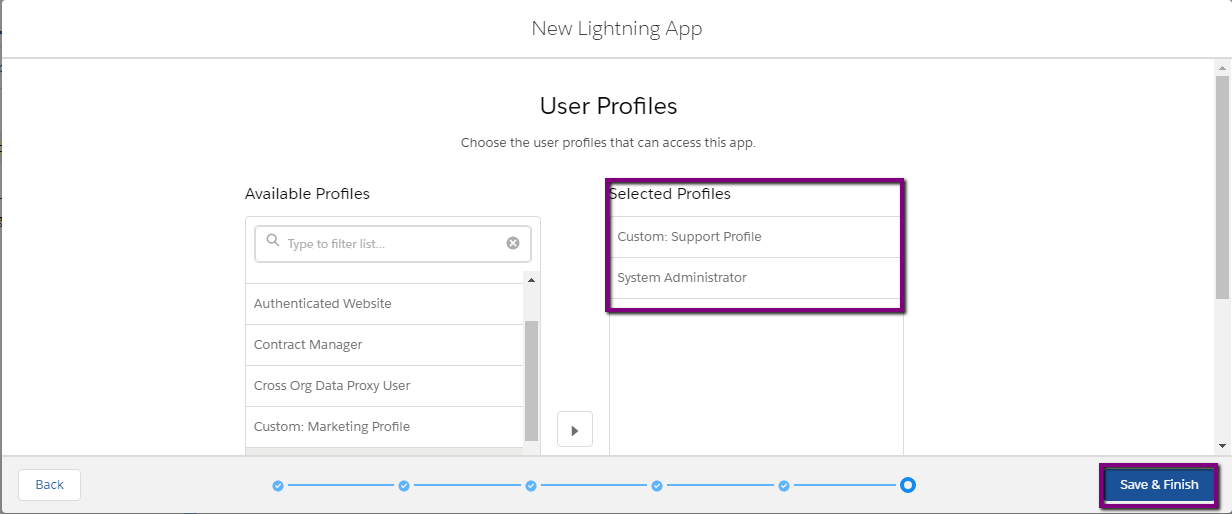
- On the User Profiles page, select Custom: Support Profile and System Administrator profile and add them to the Selected Profiles list.
- Click Save & Finish.
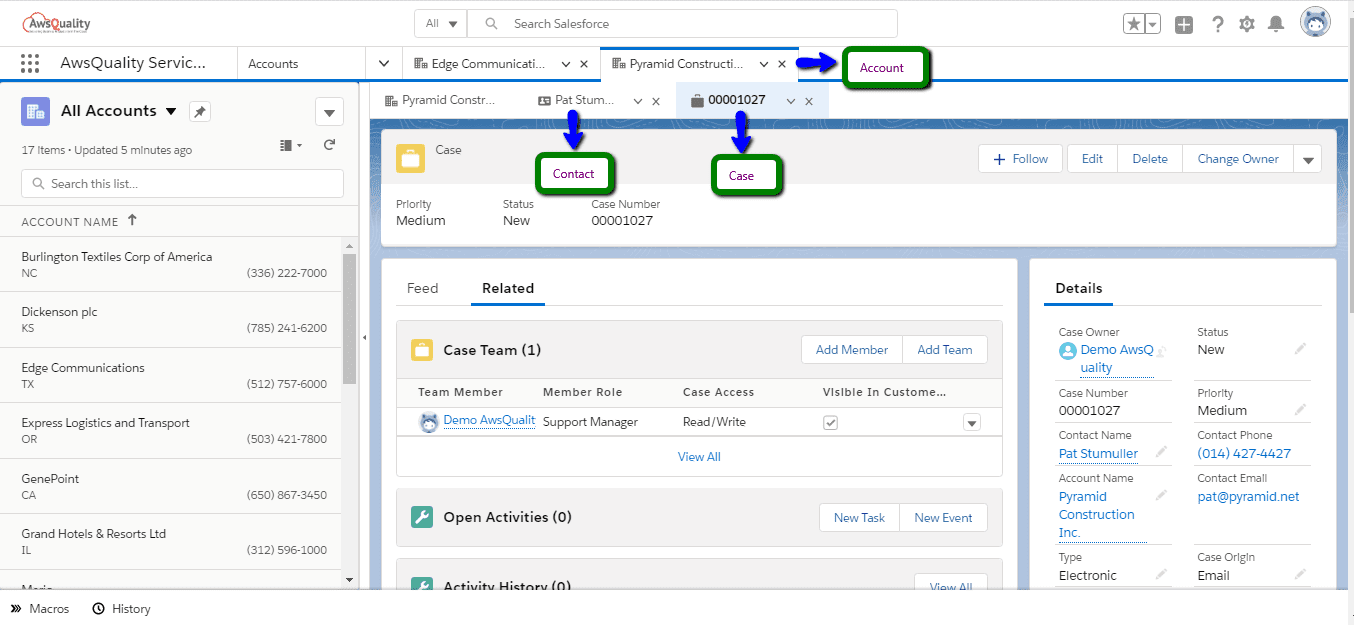
Details Record Page
- You can see all relevant details of records on a single window. You do not need to switch to another tab in order to track the details.
- You have to select any one of the Accounts and subsequently select related Contacts and Cases. It is shown in the below image…
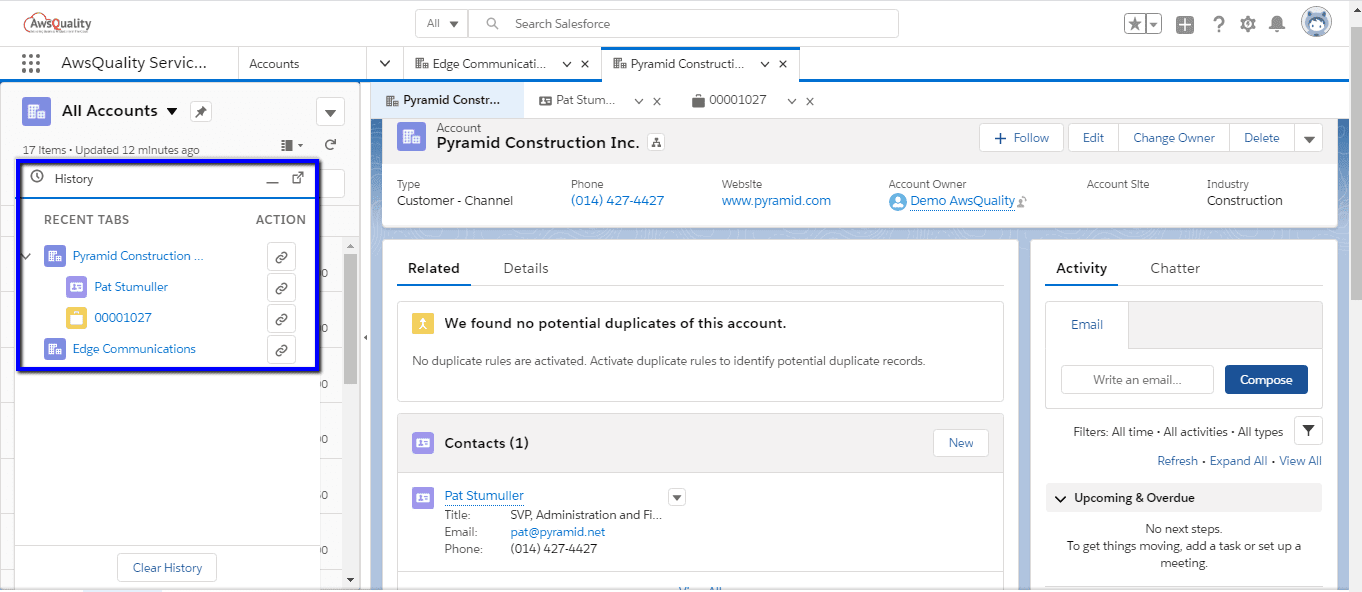
- You can track the history of any account that is shown in the below image…
Conclusion
Organizations should adopt Lightning Service Console in order to optimize the agent experience to access all of the information like customer profiles, case histories and many more all in one place that agents need to resolve the customers issues or look after it immediately without switching to open relevant records on another tab. Hence it saves a lot of time for service reps that will further enhance productivity.
 Bio
Bio