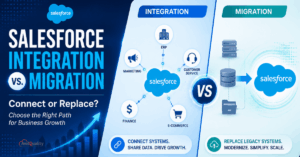
Most of the persons among us who are technical savvy use some kind of CRM (Customer Relationship Management) system to manage daily activities such as sales, sales forecasts, regression with different data of the customer, and territory management in regard to the geographical location of the customer or consumer, etc.
From the past technologies, it’s difficult to manage the territory for the customers in different kinds of CRM, here we have a Territory Management System in? Salesforce.
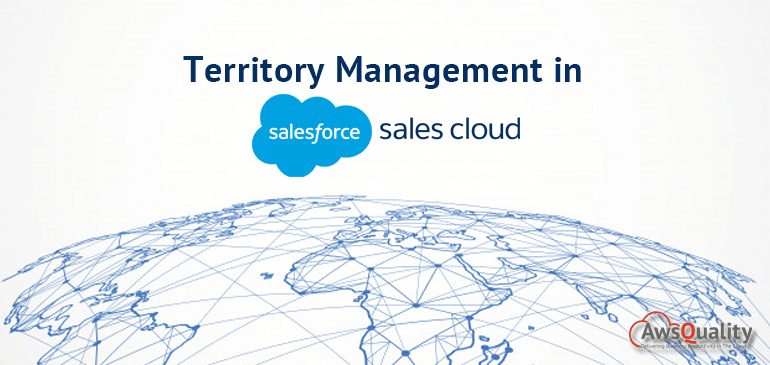
Territory Management in Salesforce is a feature of a Sales Cloud that helps reps (representatives) to access the accounts based on criteria such as postal code, industry, revenue, or a custom field.
It helps you to organize groups of accounts and the sales reps who work with those accounts based on territory. It grants access to accounts based on the characteristics of the accounts. When you configure territory settings, then users that come under the configured territory can be granted read, read/write, or owner-like access to the accounts in that territory.?
Also check: Lead Management in Salesforce Sales Cloud
Why Implement it?
In order to attract more new leads isn?t always a good thing. And it is all about quality over quantity of leads. And you have to invest more time in attracting qualified leads. It doesn?t make sense for sales reps to spend more time talking to someone where sales of products or services are difficult (particularly territory based). Therefore territory management makes tasks simple for reps to focus based on the specified territory so that maximum leads or prospects can be converted to an opportunity.
Benefits of Territory Management
- Help companies to structure Salesforce data and users in the same way as you design your sales territories.
- With sales territories, it?s easy to keep track of which reps (representative) are assigned to which accounts and opportunities.?
- It helps to allocate resources efficiently, so you?re more likely to maximize sales and profits.
- Sales forecasts based on territory makes it simple.
- Assignments made between territories, accounts, and opportunities get easy.
- Support for transferring users between territories in order to retain opportunities.
Here we will discuss the steps to set up territory management?.
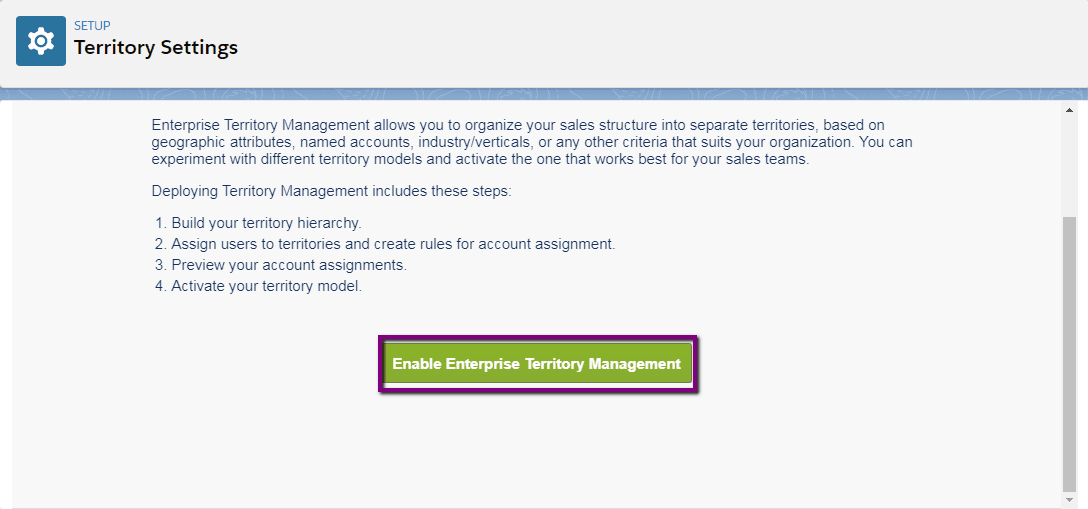
- Enter Territory in the Quick Find box from the Setup menu.
- Select Territory Settings.
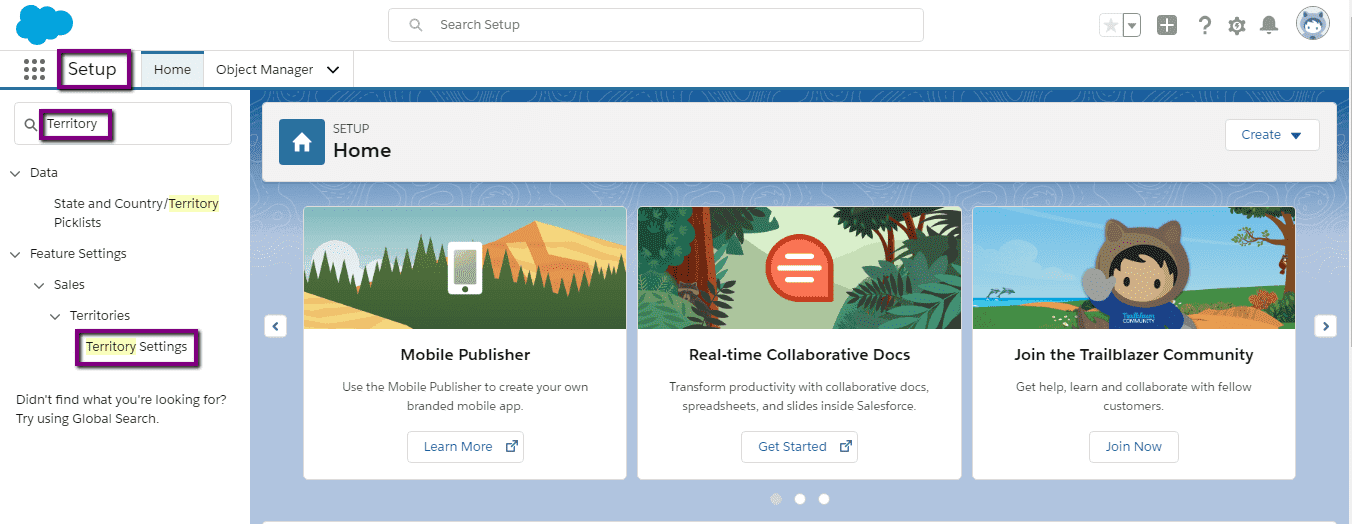
- Click Enable Enterprise Territory Management.
- You will see a success message on the screen as shown in the below image.
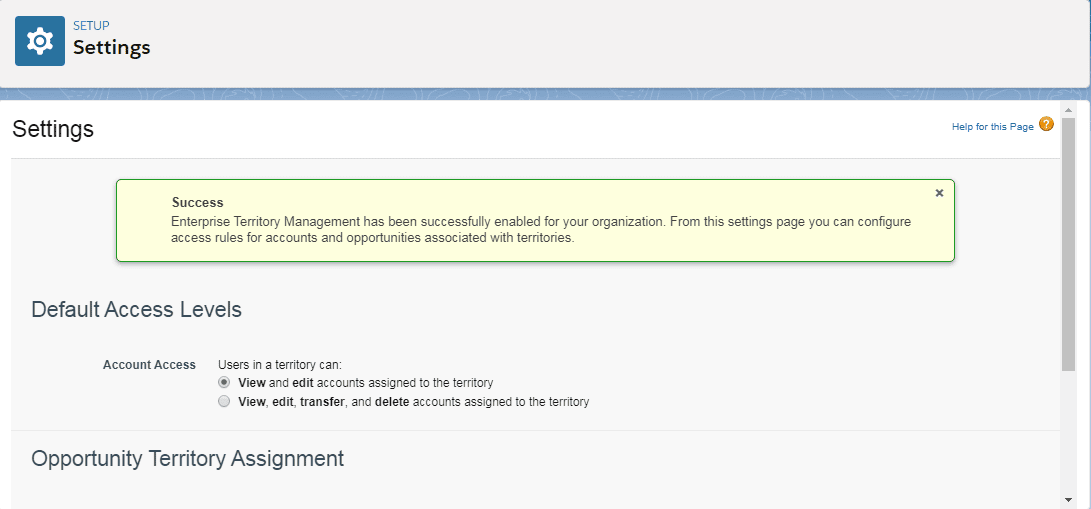
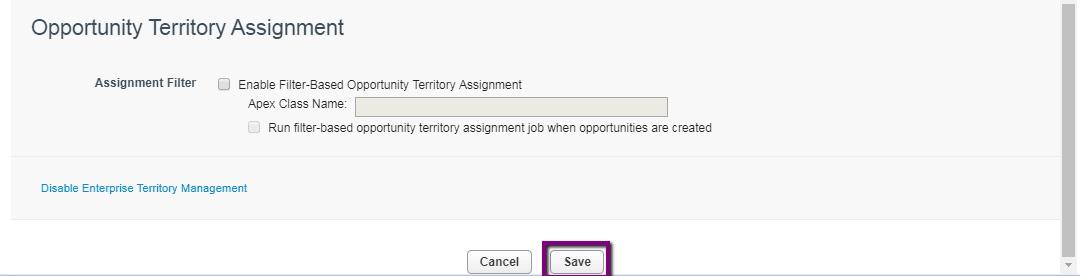
- Click Save to accept the default selection as View and edit accounts assigned to the territory.?
- Here you can see that the feature is on and the user access levels are set.
Creation of territory type
- Enter Territory in the Quick Find box from the Setup menu.
- Select Territory Types.
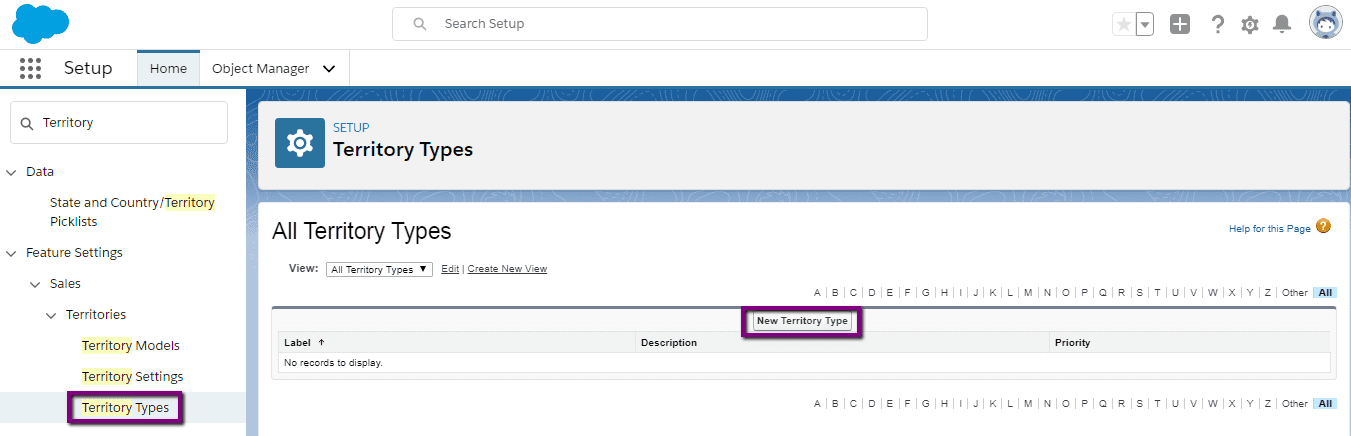
- Click on New Territory Type.
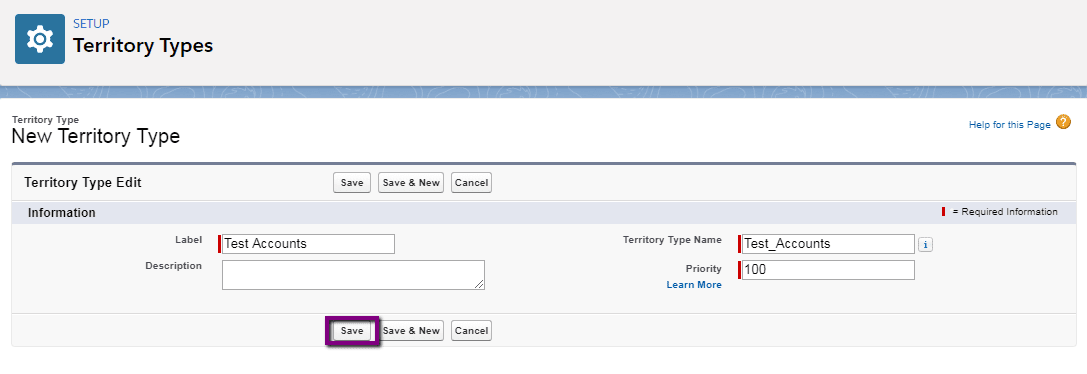
- For the label, enter Test Accounts (can be given any name).
- For the description, you can give any description related to it.
- You can specify the priority of 100 so there?s a chance to add priorities above and below this one.
- Click on Save.
Creation of Territory Model Records: Your territory model record connects your territories, user assignments, and account assignments. When you create the record then Salesforce creates a territory hierarchy based upon it. Now you have access to the territory hierarchy to complete most of the territory management tasks. Here are the steps to create it?.
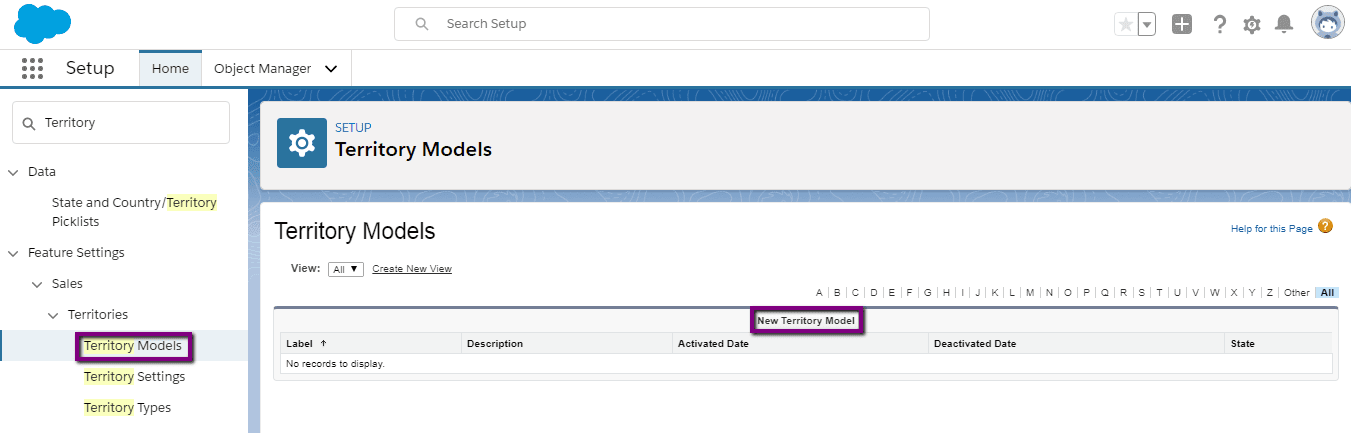
- Enter Territory in the Quick Find box from the Setup menu.?
- Select Territory Models.
- Click on New Territory Model.
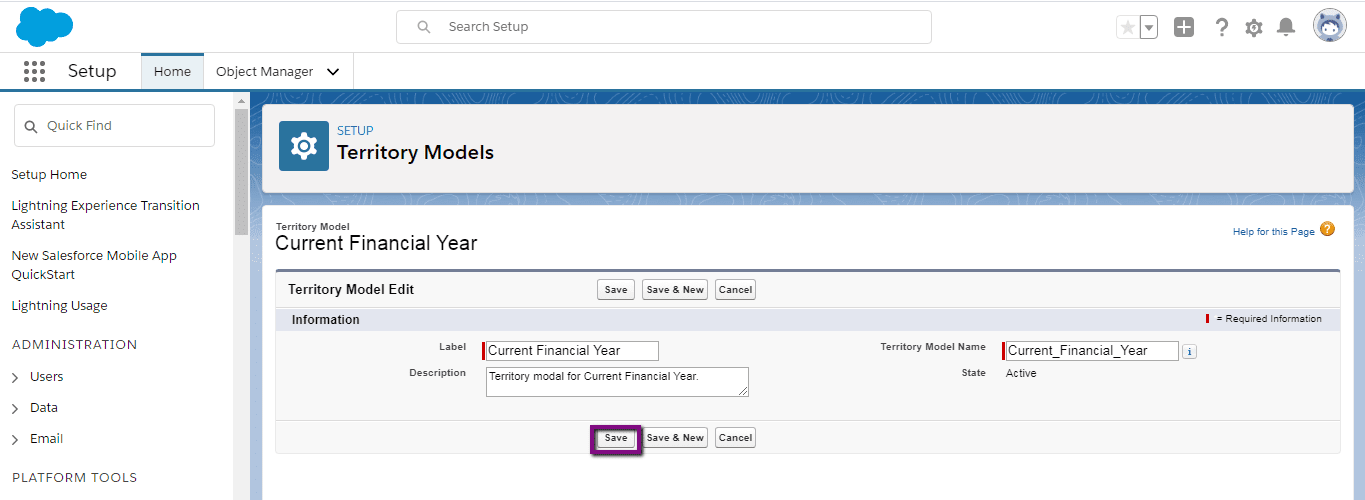
- For the label, enter the Current Financial Year (give any name).
- For the description, enter Territory modal for the Current Financial Year.
- Click on Save.
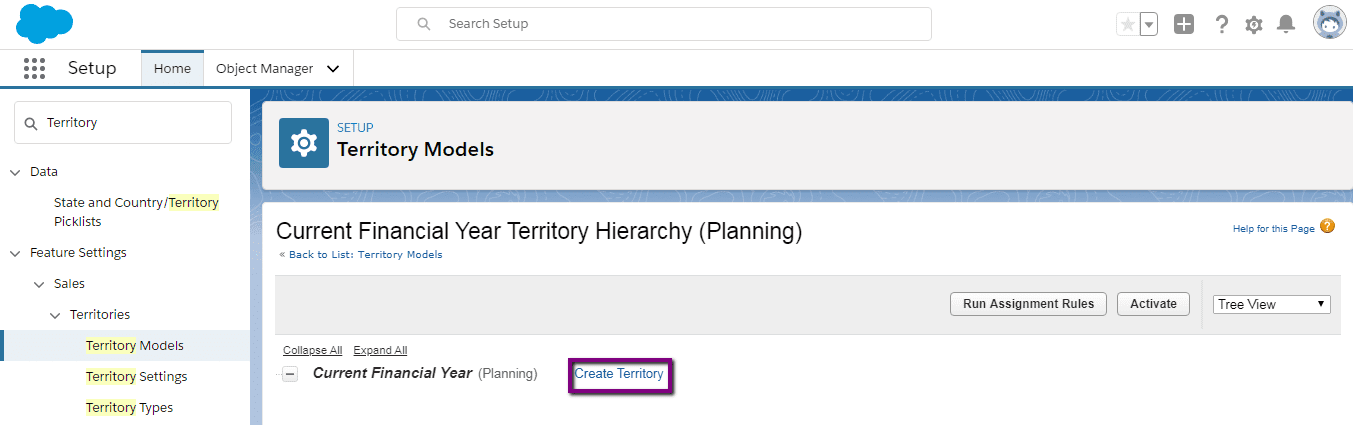
 Create a Territory
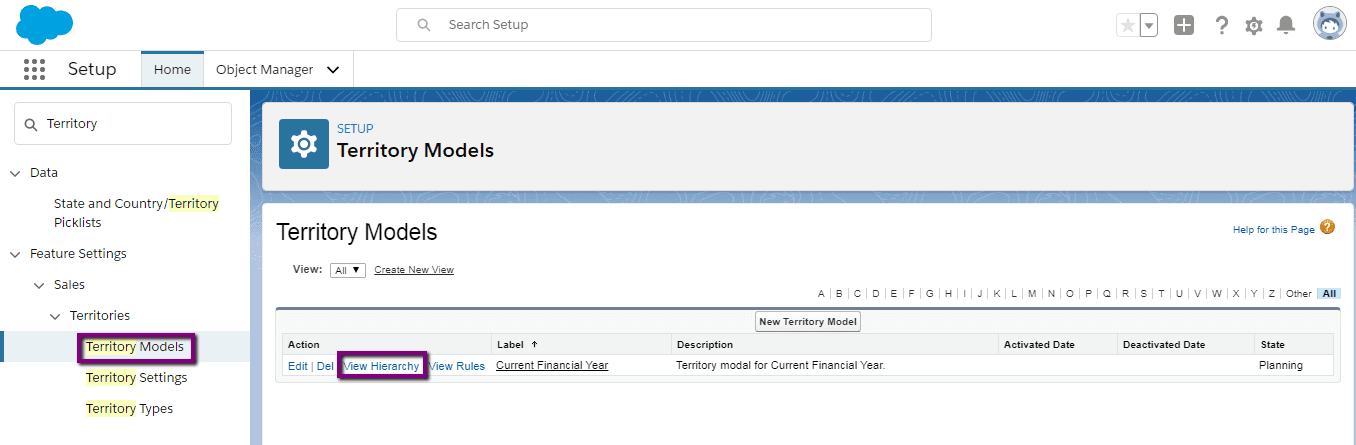
- Enter Territory in the Quick Find box from the Setup menu.
- Select Territory Models.
- Click on View Hierarchy.
- Next to the Current Financial Year, click on Create Territory.
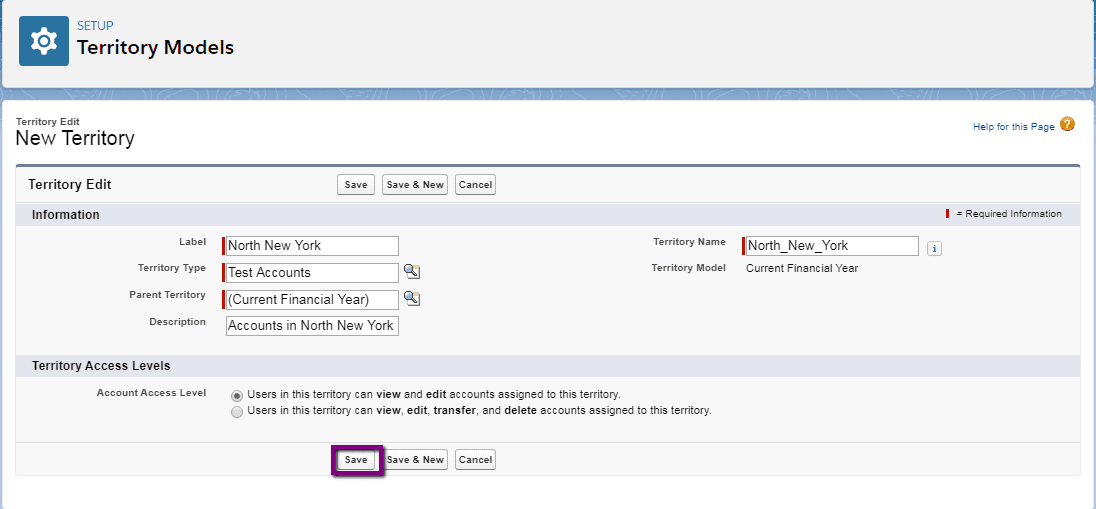
- On the New Territory page, for the label, enter North New York and select the Test Accounts territory type.
- For the description, enter Accounts in North New York.
- Click on Save.
In North New York territory, you need to assign accounts to it. Follows these steps to create and run an assignment rule that speeds up the process for you.
- In the Assignment Rules Assigned to This Territory related list, click on New.
- On the rule edit page, for the rule?s name, enter North New York Zip Code.
- For the selection criteria, enter Account: Billing State/Province equals to NY.?
- You can set any other criteria also. It depends on the requirement.
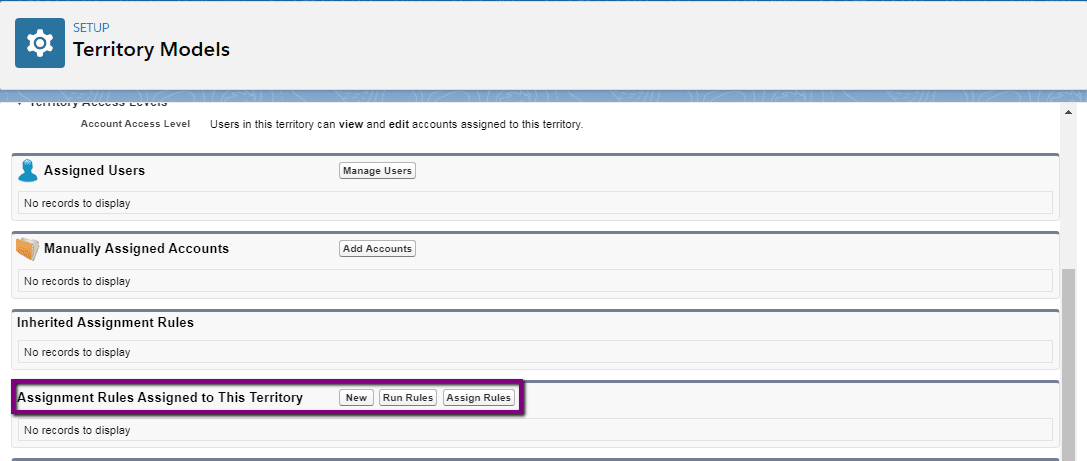
- Click on Save.

- In the Assignment Rules Assigned to this territory related list, click on Run Rules.
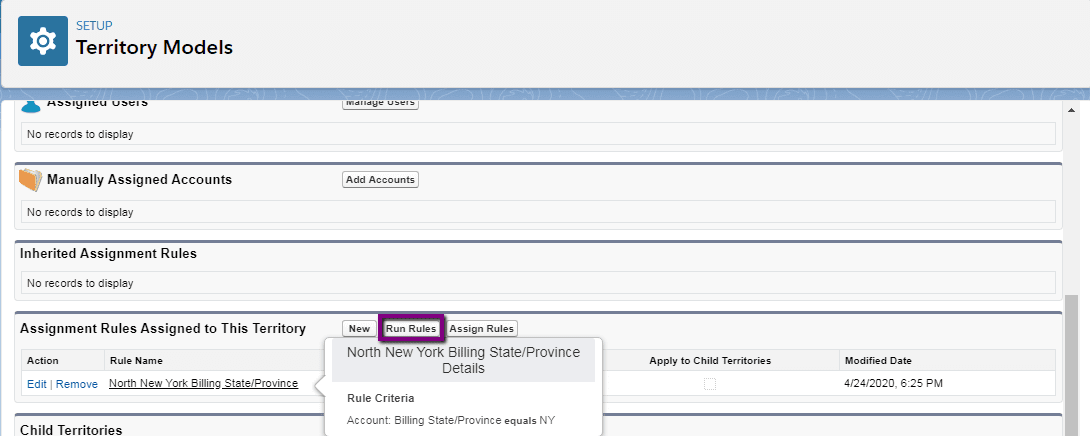
- You will see the details like in the image below.
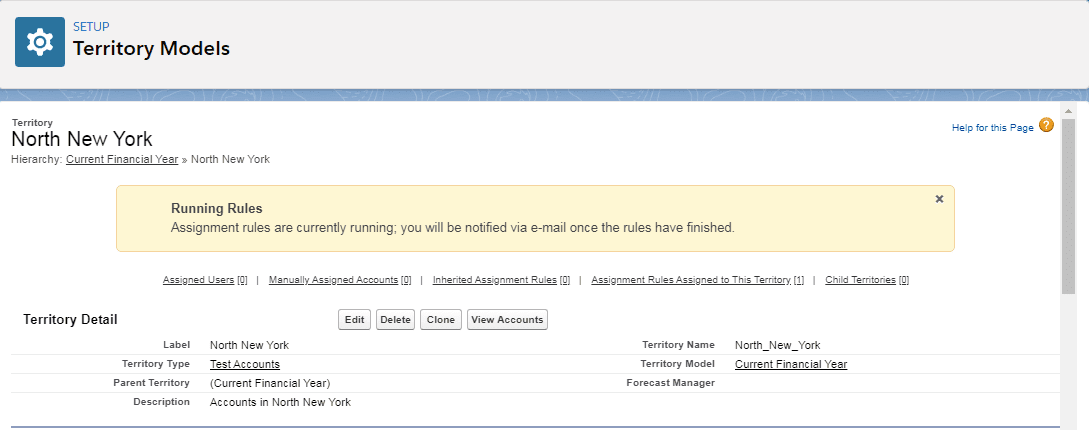
- You will get an email about the confirmation of the rule that successfully ran.
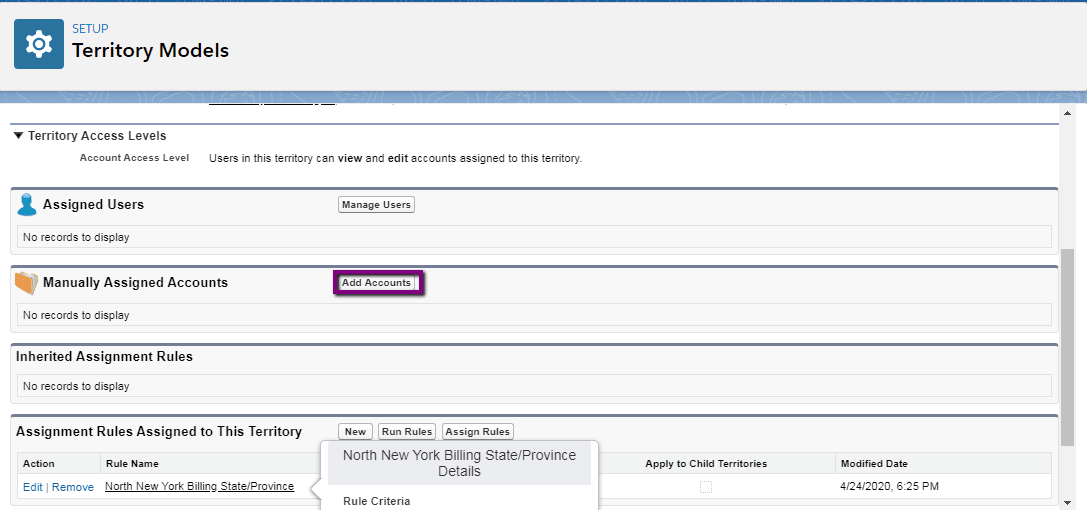
Assign an Account to a Territory Manually
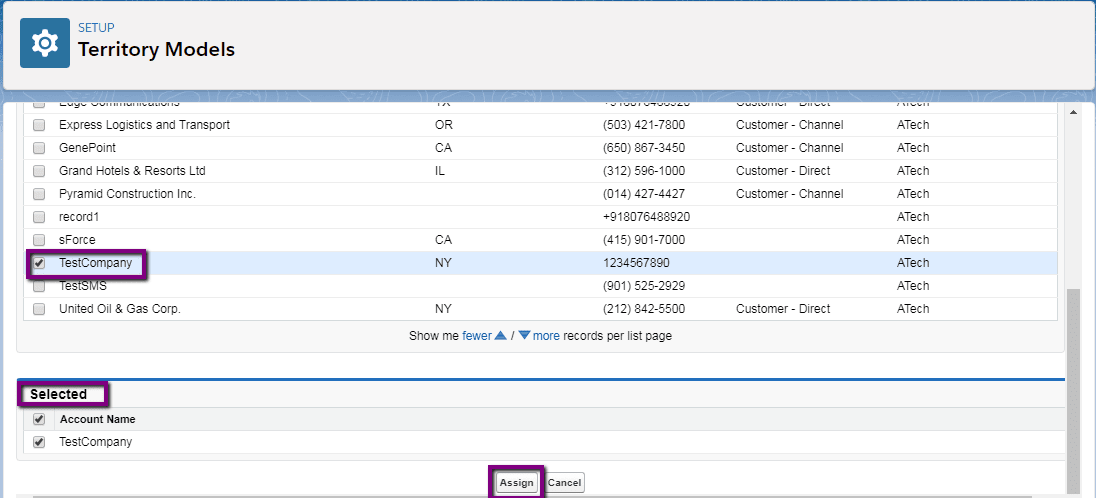
- In the Manually Assigned Accounts related list, click on Add Accounts.
- Select any Account of your choice.
- Click on the Assign button.
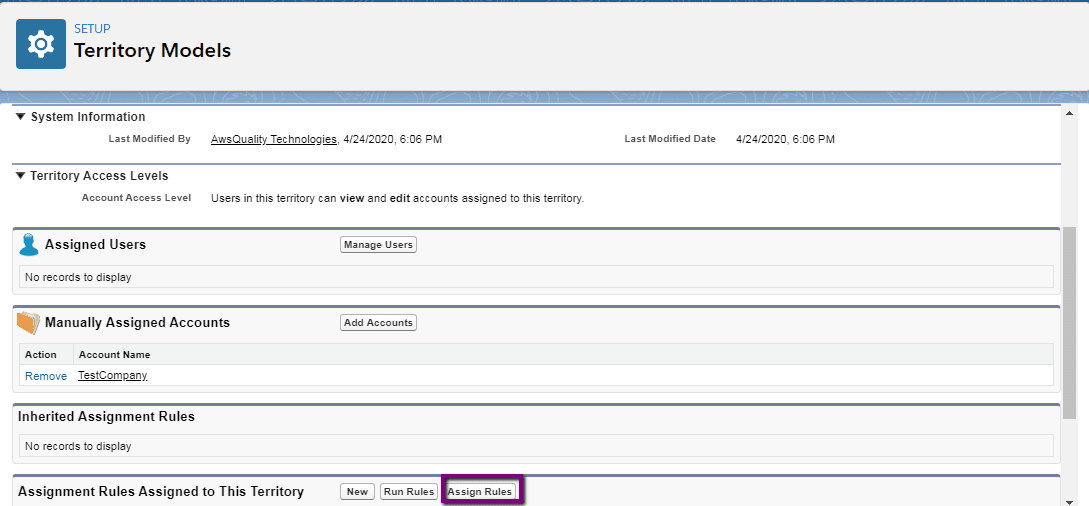
Apply an Assignment Rule to a Territory
- In the Assignment Rules Assigned to This Territory related list, click on Assign Rules.
- Select the rule and click on the Assign button.
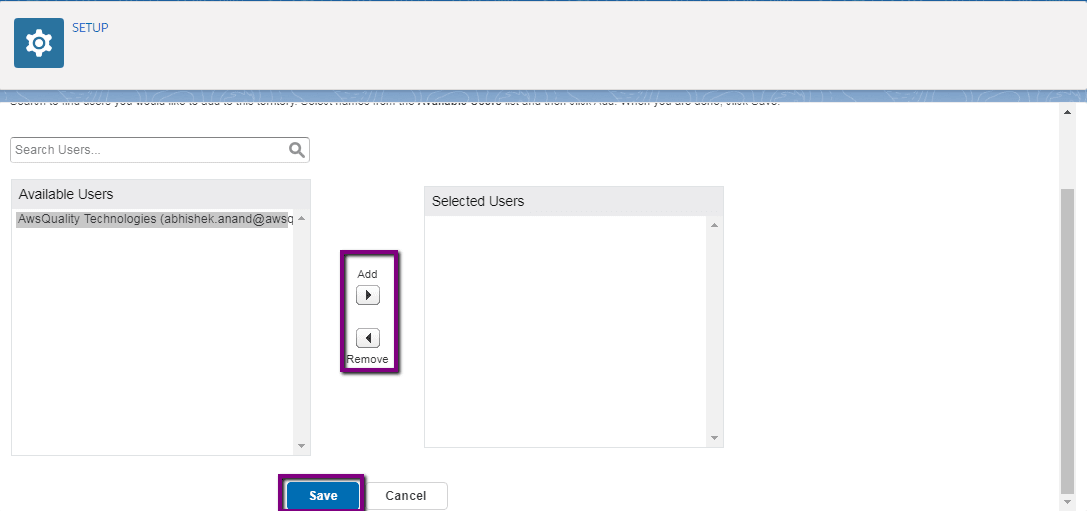
 Assign a User to a Territory
- ?In the Assigned Users related list, click on Manage Users.

- You select the user from the left column named Available Users and click on Add in order to add users in the Selected Users column.
- Click on the Save button.
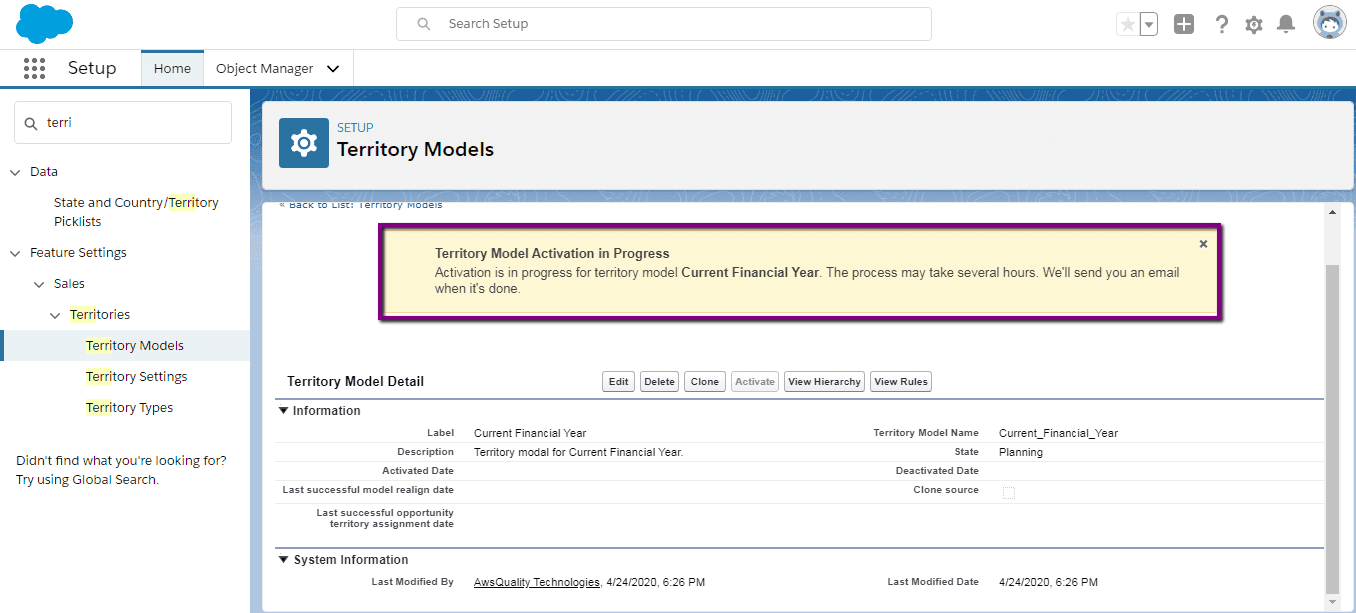
- Now click on the territory model and click on the Activate button in order to activate the territory.
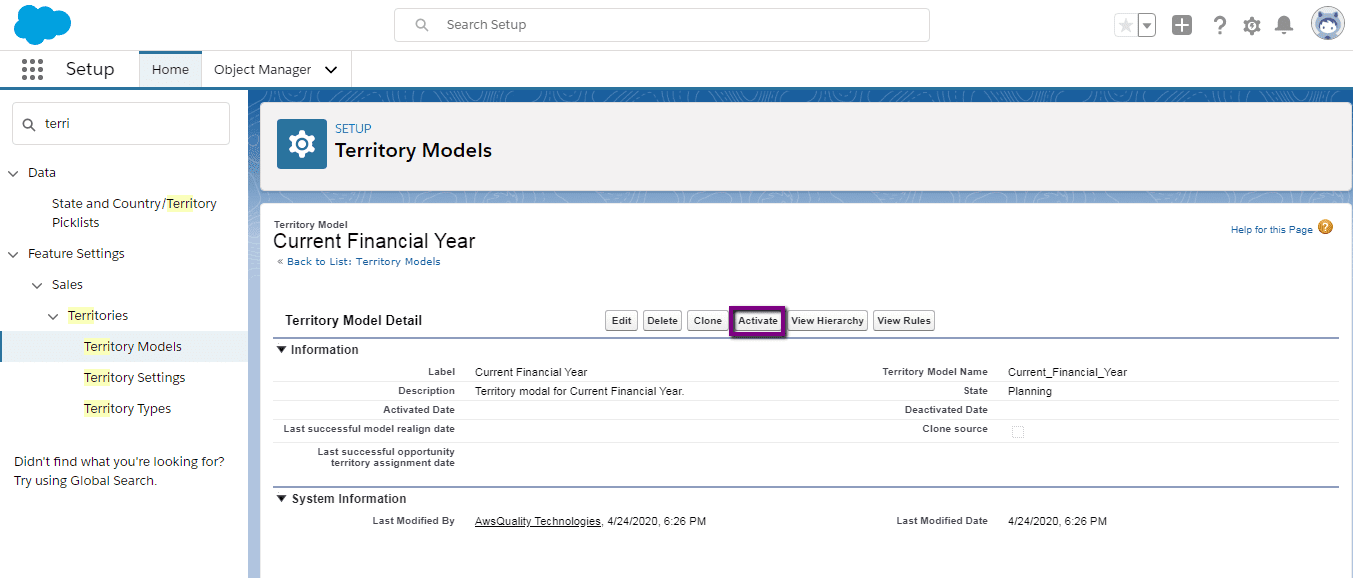
- After clicking on the Activate button, you will see a message on the screen. It is shown in the below image.
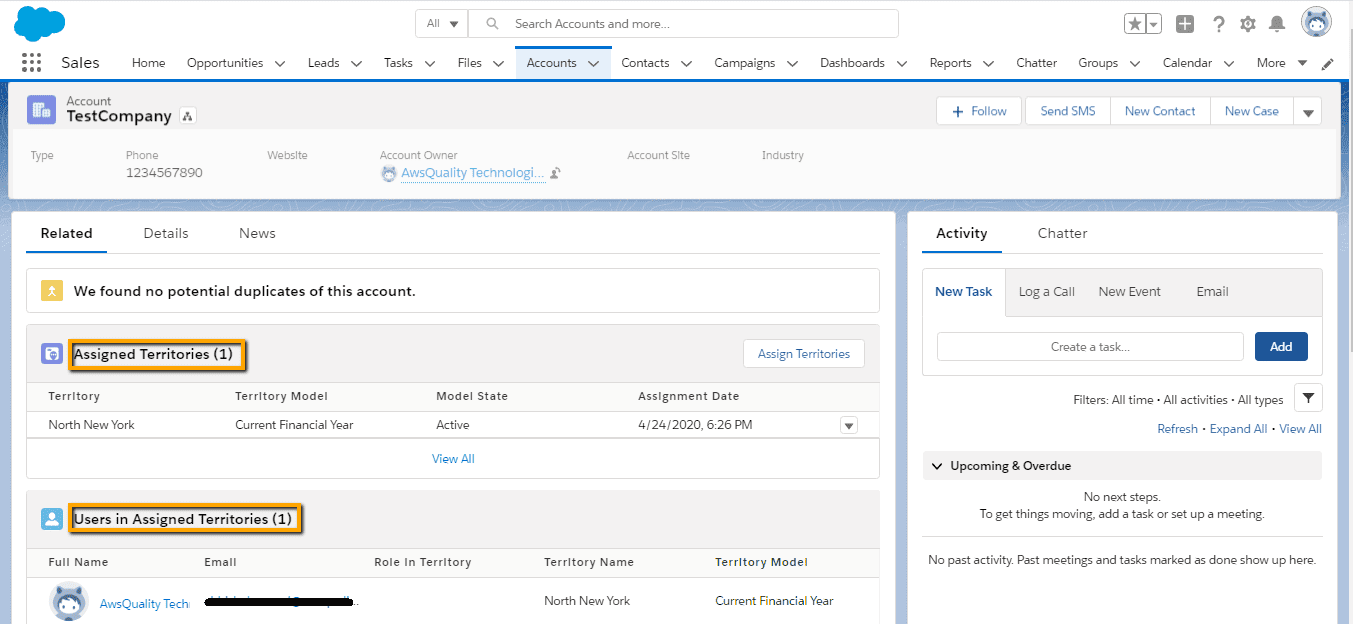
- You just go to the particular account to whom you assigned the territory and user.
- If in the related list, these two are not present then set the page layout of Account.
- Now you can see the details as shown in the image below.
Conclusion
Organizations are adopting territory management features in order to structure Salesforce data and users in the same way as you design your sales territories. With sales territories, it?s easy to keep track of which reps (representatives) are assigned to which accounts and opportunities. Hence it helps to optimize the business process and increases the productivity of an organization.
Know more about Salesforce Implementation
 Bio
Bio