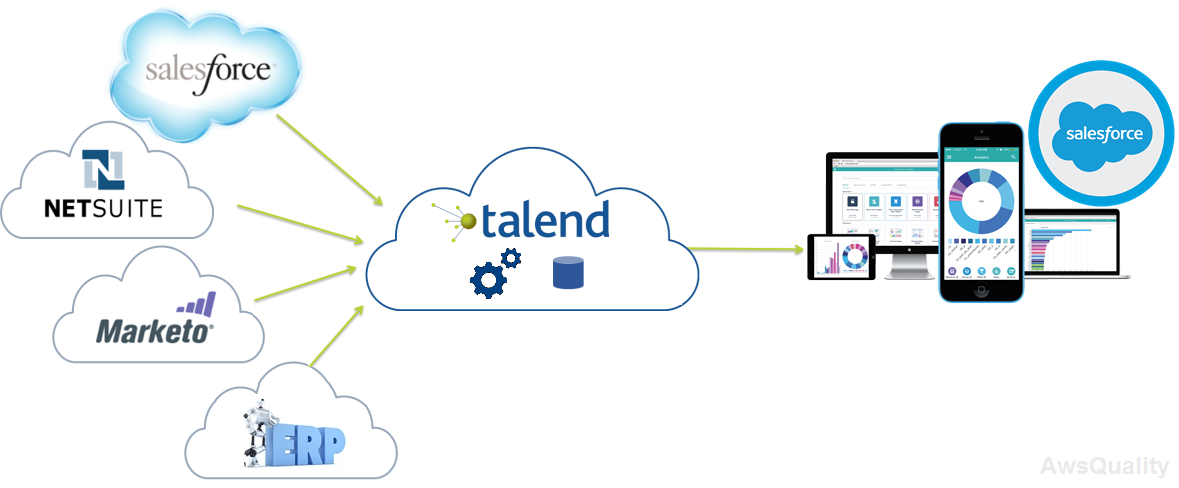
Data may be easily transferred to and from Salesforce. The data conversion task was made much easier with the Salesforce data import wizard and Salesforce Dataloader.io tools. However, these technologies become too onerous for repetitive, sophisticated, or large-scale data transfer processes. New and established data integration companies have introduced numerous tools to take advantage of these flaws while offering a better and more straightforward approach to combining two or more systems. One of these players is Talend, which has a substantial selection of data integration and migration products that may be used to move data to and from Salesforce. Tools for Talend data migration and integration have been introduced previously. Talend has been around for a while and has been steadily building its reputation and following. The accessible data conversion tool Talend Open Studio is even more popular among our Salesforce developers.
Tool for Data Integration in Talend Open Studio
In its purest form, the Talend tool is a code generation tool. Every task has a corresponding piece of code that is automatically generated and can be run in either the Open Studio tool itself or any other compiler you want. The Open studio itself is preferred by most, but you can always export the code for use in any other application you like. This tool also allows you to change the job parameters and queries, giving you more freedom when writing programs.
Describe Talend.
Software provider Talend specializes in Big Data Talend Integration. Big data, Cloud, data management, Master Data Management, data quality, data preparation, and enterprise application integration software and services are all provided by the business. It is among the most excellent open-source solutions for integrating and migrating data.
Talend: Why?
Why you should choose the Talend tool
- Simple component placement and interface.
- Drag and drop coding creation.
- greater speed of processing
- ETL with open source.
- A sizable base of supporters.
- 800 or so internal connectors.
- Run JAR and WAR files independently by exporting them.
- Utilizing Windows Task Scheduler makes scheduling simple.
- There is a cloud version as well.
How can Talend be used for Salesforce data migration?
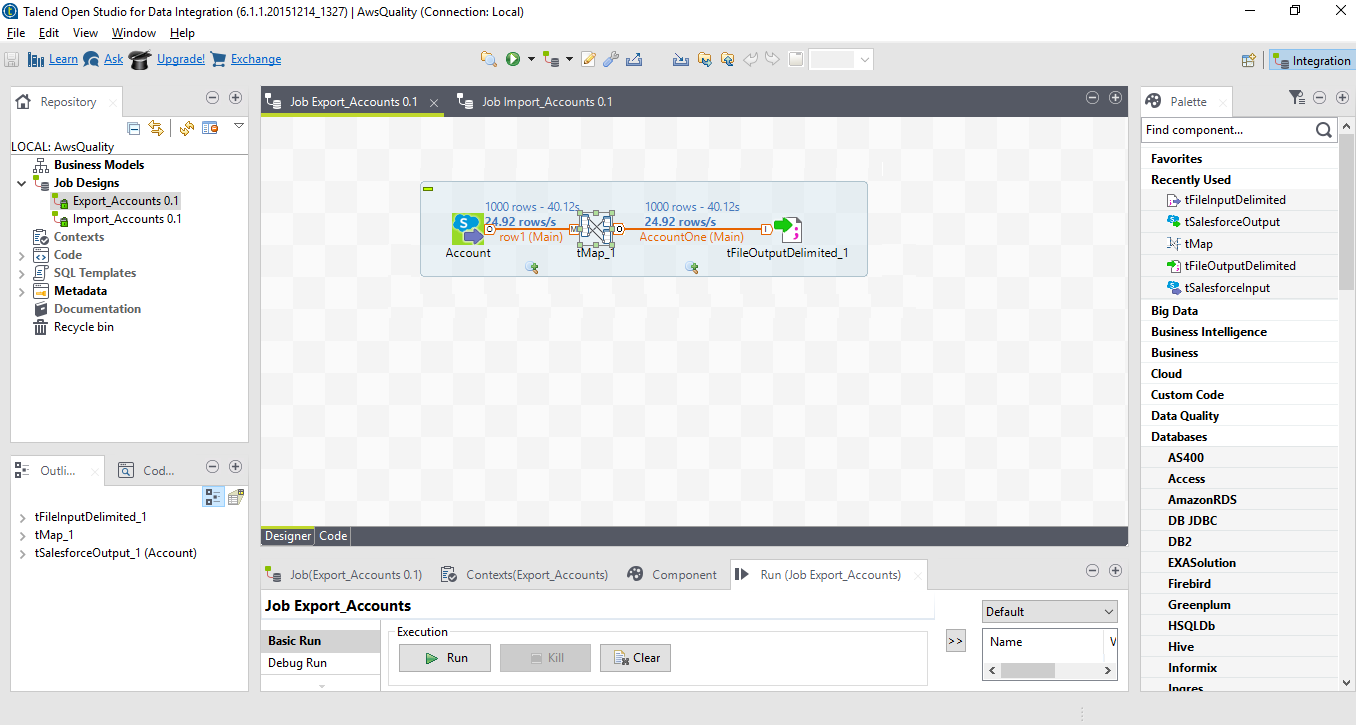
Data from a Salesforce account object being exported to a CSV file (s); here are the actions:
- Open your operating system and Talend ETL (Windows etc.).
- Create a job by selecting “Create Job” from the context menu when you right-click the Job Designs icon on the Talend window’s left side.
- You will see a new job pop-up where you must enter any name and click Finish.
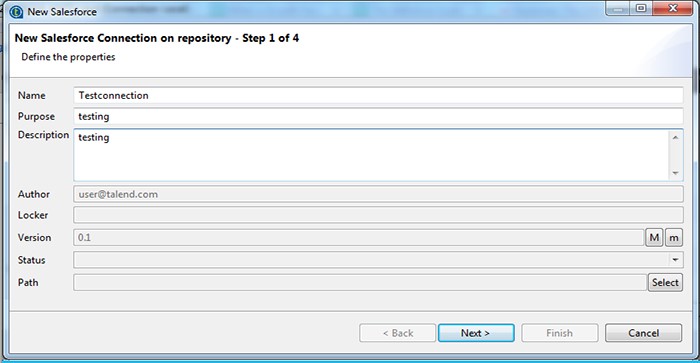
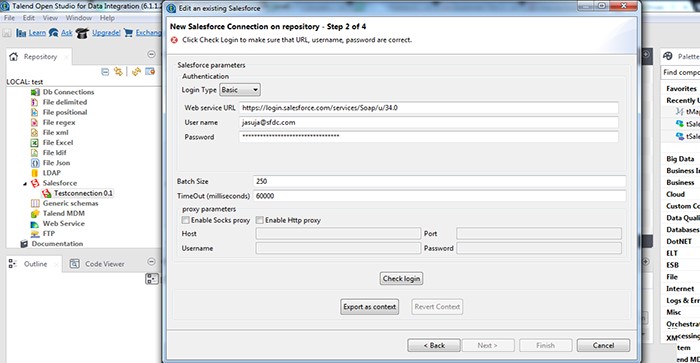
- Click the Metadata drop-down arrow. Select Salesforce. Create a Salesforce connection > Enter a name for the link> Next > Enter the login information for a legitimate Salesforce organization> login > Finish is checked.
- Choose an object in Salesforce (In our example, it is an Account object).
- Choose tMap from the palette sidebar (which is visible on the right side).
- Account, tMap, and tFileOutputDelimited can be connected by dragging the link into place.
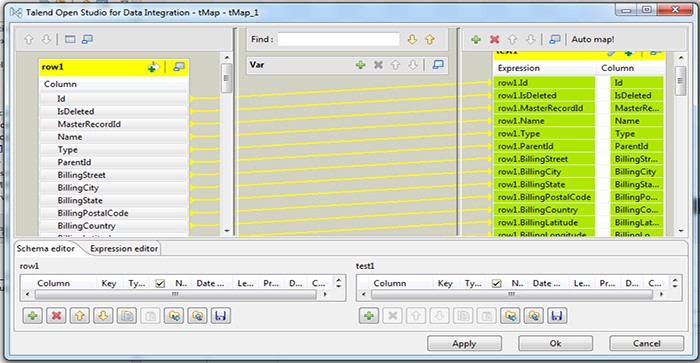
- Now perform field mapping by double-clicking on the map.
- When the job was run, the data was successfully exported into a CSV file.
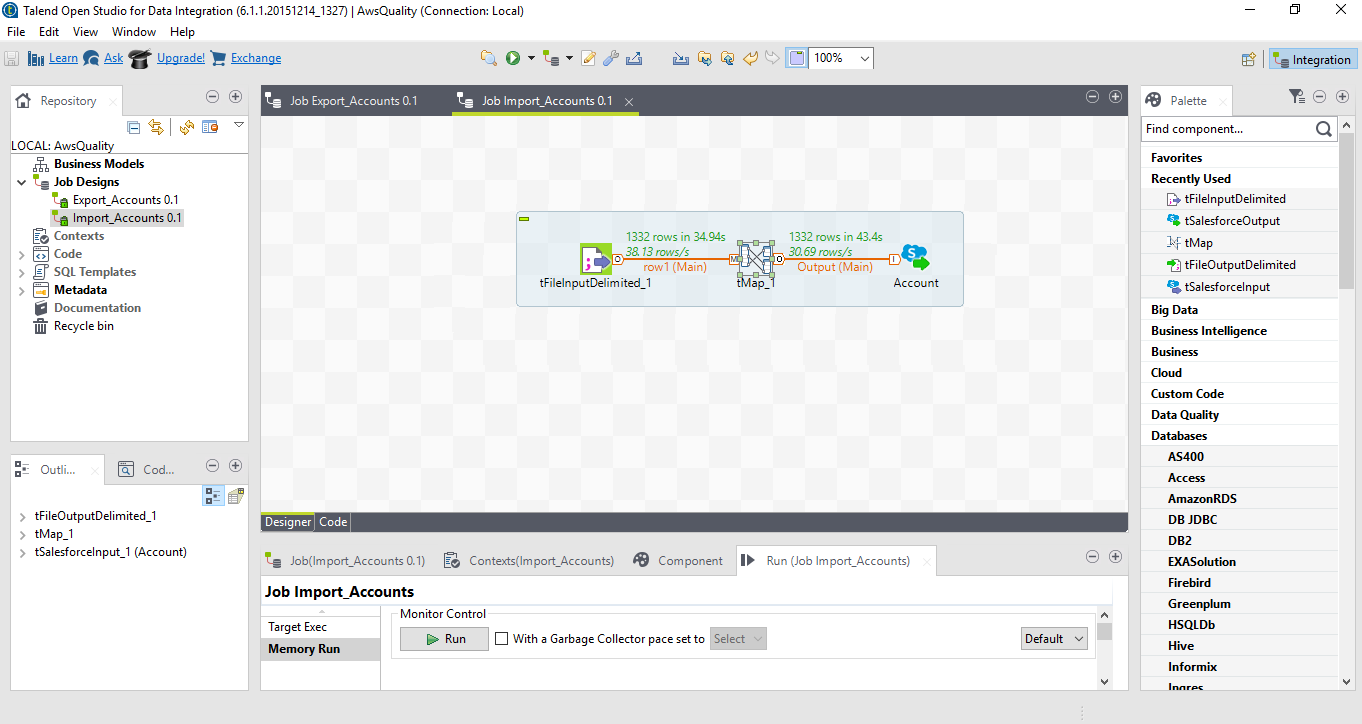
Following are the processes for importing data into a Salesforce account object from a CSV file:
- Launch Talend ETL in your operating system once more (Windows etc.).
- Create a job by selecting “Create Job” from the context menu when you right-click the Job Designs icon on the Talend window’s left side.
- You will see a new job pop-up where you must enter any name and click Finish.
- Click the Metadata drop-down arrow. Select Salesforce. Create a Salesforce connection > Enter a name for the link> Next > Enter the login information for a legitimate Salesforce organization> login > Finish is checked.
- Choose an object in Salesforce (In our example, it is an Account object).
- Choose tMap from the palette sidebar (which is visible on the right side).
- Please place a link between tFileOutputDelimited, tMap, and Account by dragging it there.
- Double-click the tMap now to perform field mapping.
- Run the operation; data was successfully imported into the Salesforce Account object.
- This is about “Salesforce Integration and Migration using Talend ETL,” The basic steps to creating a straightforward Job to migrate an Account from CSV and vice versa are shown above.
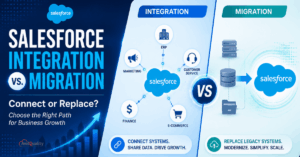
With Salesforce, ETL
After discussing Salesforce, let’s move on to data integration and why it’s crucial for any business wanting to consolidate, streamline, or simplify its data sources.
The process of merging data from several internal and external sources into a single, consolidated repository is known as data integration. For instance, a business might keep customer information in a traditional database, manage inventory information using a third-party platform, and gather more information using other applications that, in the past, might have been the best choice.
These kinds of circumstances are common. A plan that previously made sense needs to be modified as businesses expand and undergo changes that affect their software and data requirements. Data integration can help with it.
ETL (extract, transform, load) is the process that drives data integration. Data extraction from diverse sources and transfer into a single data warehouse are the first steps in data integration.
Although the data will be linked directly to the source, the approach is comparable for businesses and organizations that do not employ a data warehouse. Salesforce offers a variety of interface points, including REST, SOAP, and BULK API, to help with the integration process. These interfaces can simultaneously connect to and retrieve vast amounts of data.
Data is cleaned, validated, de-duplicated, organized, and standardized throughout the transformation stage. The various data sets are now conversing with one another at this point. The freshly transformed data is loaded (or sent) to its final location.
How to Migrate Data Using Talend
As we previously mentioned, the Talend Data Management Platform is straightforward to use. To utilize it, you can be something other than a coding expert. You may migrate data to and from your Salesforce org by following the step-by-step instructions.
Step 1: Installing
You may download and set up the Talend Open Studio Data Integration tool from this page. https://www.talend.com/download/talend-open-studio#t4. To use the tool, you would require Java Runtime Environment.
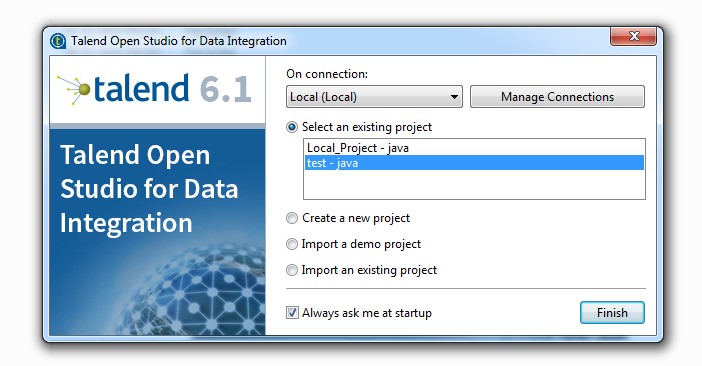
Step 2: Launch Talend and create a job
To begin, launch Talend and start a new project. You can build a local project using the default credentials or the correct username and password to access a project stored on the Cloud.
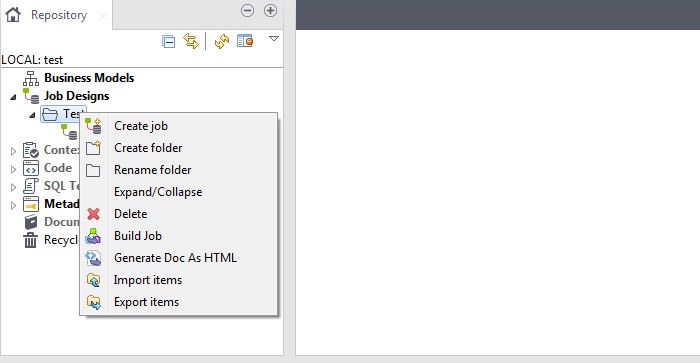
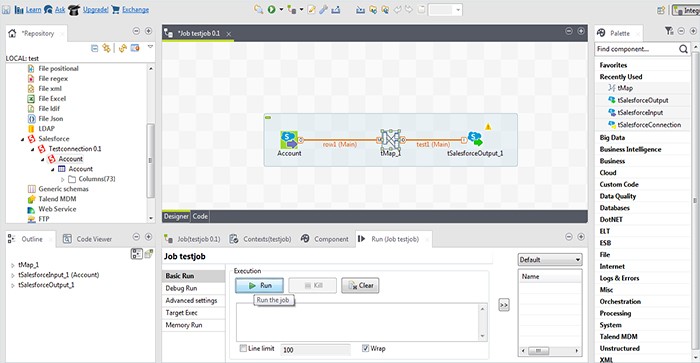
After starting a new project, the first thing to do is to find a new job. You may locate a section called Job Design in the Repository section of the left side panel. To create a new job, right-click the item. Making folders is an intelligent concept if you want to organize your appointments. The Job Designer window is displayed when a new job is created.
Step 3: Establish a fresh Salesforce element of metadata
The benefit of 800+ connectors may now be felt at this stage. Salesforce’s metadata connector is embedded into Talend. The metadata area of the Repository panel should first be expanded. Next, locate Salesforce in the enlarged section and choose to Create Salesforce Connection from the context menu.
The software could be prompted to install more modules as a result.
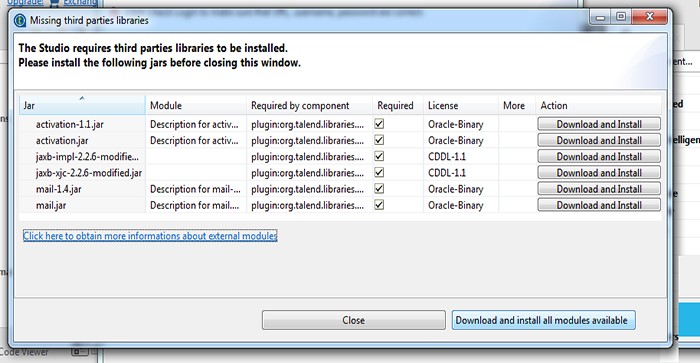
Once installed, enter the required information. It would help if you combined your Salesforce security token with your current password for a successful connection.
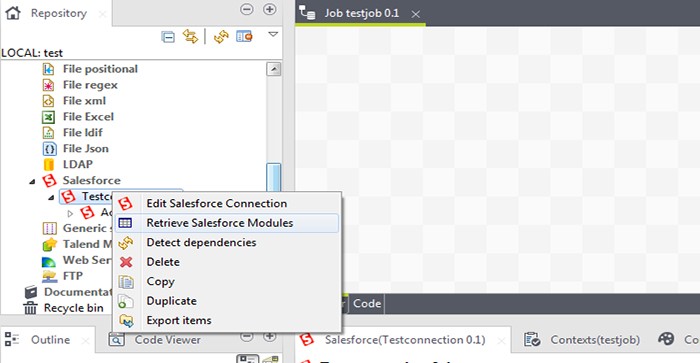
By selecting retrieve Salesforce module from the context menu of the newly created connection, you can retrieve all Salesforce modules. All pre-built and custom Salesforce modules are listed here, and you can obtain them by choosing them from the list. This action will retrieve the module’s entire set of columns.
Step 4: Connecting the input and output devices
You can drag and drop your Salesforce connection to the Job Designer window once you’ve finished creating it. The critical parameters for the component will appear on the screen immediately below the job designer when you click the connection in the job designer screen. These options specify the action you would take about the object. The connector type you select will determine the input and output activities.
You can also make a new connection by dragging a connection component from the “Palette” panel on the right side. Access SaleforceOutput by going to Cloud> Salesforce. To add the element to the job designer, drag it there. After that, click the part to make simple connection settings edits.
Currently, all you have to do to combine an input component with an output component is click on the tiny red arrow next to the input component and drag it over to the output component.

Step 5: Mapping
This method of connecting components functions flawlessly when you don’t need to map the data for effective transfer.
For instance, you could need to move Salesforce data from one Excel file or MySQL database to another. However, you might need to use the tMap component to perform a rather complex data transfer, such as moving the data from one Salesforce org to another. The ‘Process’ menu in the Palette contains this component. Connect the input component to the tMap, then connect the tMap to the output component by dragging and dropping the element into the task designer.
The ‘Process’ menu in the Palette contains this component. Connect the input component to the tMap, then connect the tMap to the output component by dragging and dropping the element into the task designer. The mapping screen may also be opened by double-clicking the mapping component, which has drag-and-drop and auto-map functionality. I promise you; it’s helpful.

Step 6: RUN
I’m done now. You’re done now. Now all you have to do is complete the task. You can launch the study in various ways, including right-clicking it in the repository panel and choosing “Run Job” or clicking the Run Job button in the component detail panel beneath the job designer panel.
Talend vs. Dataloader
These tasks are now simple and can be completed using the Data Loader desktop application (not the dataloader.io tool). However, Talend Services shines when you need to conduct complicated data transfer operations involving numerous connected data items and incorporate Lookups based on external data.
Future of Talend and Salesforce
Today, Talend for ETL is a crucial standalone product that exists independently of Salesforce and has a distinct identity. In other words, even if it is well-liked by Salesforce customers, it is also incredibly well-liked by users of different SaaS and data applications, such as Alfresco and Amazon services.
This indicates that Talend is constantly changing, giving you a Talend Data Integration Tool that?will update in line with the advancement of the two connected technologies. Thus, spending time mastering the product will benefit you in the long run. Aside from that, the learning curve is not particularly severe.
 Bio
Bio